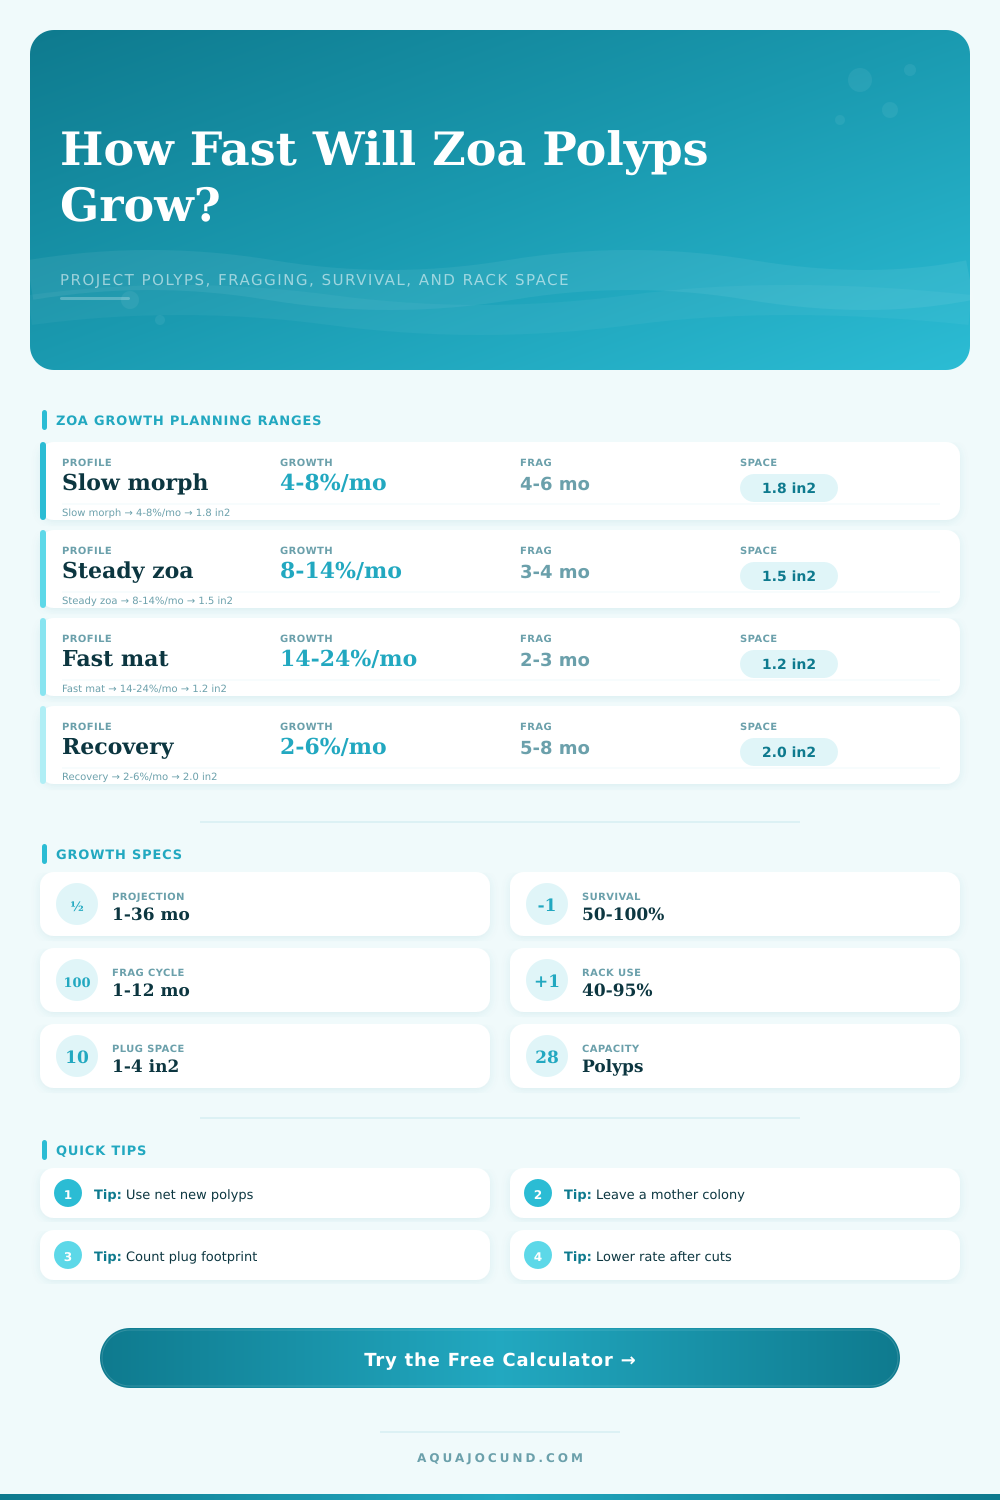
Zoa Polyp Growth Projection Calculator
Project zoanthid polyp count, fragging cycles, survival after cuts, rack footprint, grow-out space, and tank capacity from a single planning sheet.
Projection Breakdown
| Month | Live Polyps | New Plugs | Rack Used | Capacity |
|---|
| Zoa profile | Typical net monthly growth | Usual frag interval | Planning note |
|---|---|---|---|
| Slow or sensitive morph | 4% to 8% | 4 to 6 months | Use larger mother reserve and gentler frag percent. |
| Steady mixed zoa | 8% to 14% | 3 to 4 months | Works well for standard rack planning. |
| Fast mat-forming zoa | 14% to 24% | 2 to 3 months | Check rack crowding before every cut. |
| Tiny-polyp dense mat | 12% to 20% | 2 to 4 months | Higher polyp counts can fit per plug. |
| Large-polyp palythoa style | 5% to 10% | 4 to 7 months | Use wider plug spacing and lower capacity. |
| Fresh-cut recovery | 2% to 6% | 5 to 8 months | Use reduced growth until full extension returns. |
| Plug spacing style | Area per plug | Best use | Capacity effect |
|---|---|---|---|
| Tight grow-out | 1.0 to 1.2 sq in | Small closed plugs and short holds | Highest rack count, least buffer |
| Standard egg-crate spacing | 1.4 to 1.8 sq in | Mixed zoa frags with moderate flow | Balanced rack count and access |
| Wide healing gap | 2.0 to 2.8 sq in | Fresh cuts or larger palythoa polyps | Lower count, more flow around plugs |
| Mini colony tile | 3.0 to 4.0 sq in | Grow-out discs or small tiles | Fewer pieces, higher polyps per piece |
| Tank example | Footprint | 55% rack zone | Standard plugs at 80% |
|---|---|---|---|
| 10 gallon rectangle | 20 x 10 in | 110 sq in | 58 plugs |
| 20 long rectangle | 30 x 12 in | 198 sq in | 105 plugs |
| 40 breeder rectangle | 36 x 18 in | 356 sq in | 190 plugs |
| 75 gallon rectangle | 48 x 18 in | 475 sq in | 253 plugs |
| 120 gallon rectangle | 48 x 24 in | 634 sq in | 338 plugs |
| Planning variable | Conservative | Standard | Aggressive |
|---|---|---|---|
| Excess polyps fragged | 20% to 30% | 35% to 50% | 55% to 70% |
| Mother reserve | 10+ polyps | 6 to 10 polyps | 3 to 6 polyps |
| Frag survival | 70% to 82% | 83% to 92% | 93% to 98% |
| Post-cut slowdown | 25% to 45% | 10% to 25% | 0% to 12% |
For most of us who have gotten into the zoanthid craze, we start out with only the faintest idea that we’re setting up some living things and hoping they grow into something cool. We don’t realize that we has a little biological assembly line in our tanks. This means we need to keep track of where everything goes and be quite patient. A few inches here or there often separates a beautiful, colorful carpet from an overcrowded zoo tank. How do you avoid becoming one? Plan ahead and allow room for all the polyp that will soon be calling your tank home.
That’s right, each new polyp need a place on your tank. To avoid the guess work of rack saturation and exponential expansion, you simply input your initial numbers (count) and expected growth rate and let the calculator up top handle the math for you.
Plan Space for Your Zoas
One thing most folks don’t take into consideration is rapid increase of a multiplying colony. Ten percent per month sounds reasonable right? Well what if I told you that’s roughly doubling your population every 7 months due to compound growth? That is correct. That’s where folks mess it up. They are too concerned with the color or length of polyp extension and not paying attention to how much floor space that require. If you don’t plan for the space needed from the start, you’ll find yourself jam packing plugs into areas that block water flow. This will eventually result in poor health and sudden losses.
This is where theory gets translated into real world experience with your own tank: fragging. Taking a colony and cutting it doesn’t only generate more stock but also shocks the organism in the moment. This is a variable that most casual growers don’t consider when predicting growth. It will basically reverse growth or pause growth while it heals itself from being sliced up. Not factoring this “post-frag slow down” into your calculations will give you wildly optimistic growth expectations. You’ll want to leave enough mother reserve so that the original colony can bounce back.
But there’s another catch to this, rack size capacity. Your zoas may be growing like weeds, but if they have no place to go…you know what happens next. The table on the site will give you an idea of how space affects the number of frags you can squeeze into a typical sized tank. While I understand the temptation to cram as many plugs as possible into your rack(s), doing so limits amount of water passing through each piece. Because zoas are flow-dependent corals, they need steady current that moves nutrients toward them and waste away from them. Overcrowding causes dead spots where waste builds up, resulting in slimy surfaces and eventually death. More is not always better…it’s a balance between density for numbers today and health tomorrow.
I am going to mention something that most folks don’t think about, tank shape. While a bow front tank looks nice on the sides, the curvature of glass consumes valuable floor space in which you could place your frag racks. This calculator also accounts for rectangular tanks as well as cylinder shaped ones so that you get an accurate picture of what kind of real estate you have to work with. It may be true that you have a lot of water, but if you don’t have much surface area on which to put your racks, then your capacity is limited no matter how great your water parameters are. If you know your usable footprint, you’ll have a better idea of how many plugs you can reasonably keep without overrunning your system.
And then there are survival rates. It happens, even for the most seasoned fragger, some fragments gets lost along the way. With this tool, you can set a conservative survival rate and protect yourself from over-projecting what you’ll end up with. Ninety percent is great; however, that’s 1 out of every 10 plugs that won’t survive to your final count. Over time (e.g., a year of aggressive fragging), those losses begins to add up. Having a buffer in your plan ensures that you’ll still be on target, even if everything doesn’t go perfect.
In summary, there’s a fine line between rapid growth and maintaining health. On one hand, you desire fast growing zoas, but on the other, you don’t want them growing too fast in an unhealthy way or using up all the real estate. On one hand, you desire fast growing zoa, but on the other, you don’t want them growing too fast in an unhealthy way or using up all the real estate. If you can project forward, plan how/where to frag accordingly.
Frag confidently because you know exactly where every new piece is going. Don’t grow zoa for zoa. Grow zoa so they’re healthy and thriving. Grow zoa so they’ll fit nicely into your system. Manage the colony now and grow it out like you watched that first fragment open.