RO to Lower Salinity Calculator
Plan RO or low-salinity water exchanges from current and target salinity, system volume, evaporation top-off, sump split, daily drop limit, and safety margin.
🎯Quick Presets
⚙Calculator Inputs
📊Salinity Lowering Quick Grid
💧RO Source And Exchange Method Reference
| Source or method | Typical salinity used | Best calculator use | Planning note |
|---|---|---|---|
| Fresh RO/DI | 0 ppt | Reef and marine lowering | Fastest dilution; match temperature and add slowly. |
| RO storage with salt creep | 0.1-1 ppt | Real container estimates | Measure if buckets, hoses, or pumps touch saltwater. |
| Low brackish blend | 1-8 ppt | Brackish step-down | Useful when the target is not freshwater. |
| Sump-only exchange | Source water entry | Systems with accessible sump | May need smaller stages if sump volume is small. |
| Slow display exchange | Source water entry | No sump or nano systems | Use a lower daily drop and strong circulation. |
| Batch correction | Source water entry | Livestock-free water prep | Larger changes can be planned, then retested before use. |
⏱Daily Drop And Stage Guide
| System condition | Suggested max drop | Retest timing | Calculator setting |
|---|---|---|---|
| SPS, clams, sensitive inverts | 0.2-0.4 ppt/day | 12-24 hours | SPS or sensitive coral |
| Mixed reef | 0.5 ppt/day | 8-24 hours | Mixed reef |
| Fish-only marine | 1 ppt/day | 6-12 hours | Fish-only marine |
| Brackish adjustment | 1-2 ppt/day | After behavior and tests stabilize | Brackish aquarium |
| Quarantine hyposalinity plan | 1-3 ppt/day | Per treatment protocol and meter check | Quarantine or hypo plan |
| Empty mixing container | Full correction possible | After mixing clear and stable | Batch or livestock-free correction |
📏Common Tank Size Lowering Examples
| Nominal system | Approx dimensions | Net planning volume | RO for 36 to 35 ppt |
|---|---|---|---|
| 10 gallon nano | 20 × 10 × 12 in / 51 × 25 × 30 cm | 8.5 gal / 32 L | 0.24 gal / 0.9 L |
| 20 gallon long | 30 × 12 × 12 in / 76 × 30 × 30 cm | 17 gal / 64 L | 0.47 gal / 1.8 L |
| 40 breeder | 36 × 18 × 16 in / 91 × 46 × 41 cm | 35 gal / 132 L | 0.97 gal / 3.7 L |
| 75 gallon reef | 48 × 18 × 21 in / 122 × 46 × 53 cm | 66 gal / 250 L | 1.83 gal / 6.9 L |
| 120 gallon reef | 48 × 24 × 24 in / 122 × 61 × 61 cm | 105 gal / 397 L | 2.92 gal / 11 L |
| 180 gallon reef | 72 × 24 × 24 in / 183 × 61 × 61 cm | 160 gal / 606 L | 4.44 gal / 16.8 L |
🔄Salinity-Lowering Comparison Table
| Approach | Math model | When it fits | Main caution |
|---|---|---|---|
| Top-off first | Replace evaporated water before exchange math | Evaporation caused a high reading | Do not double-count evaporation as an exchange. |
| One-shot exchange | Single fraction from current to target | Small correction or empty batch | Can exceed livestock comfort if the drop is large. |
| Staged exchange | Repeat limited daily drops | Livestock present | Retest between stages because each step changes the next fraction. |
| Sump-only exchange | Compare first stage against sump volume | Reef systems with accessible sump | Stage volume may need splitting if it exceeds sump operating volume. |
| Display slow exchange | Small exchange with high circulation | Nano tanks and no-sump systems | Add RO away from animals and temperature-match carefully. |
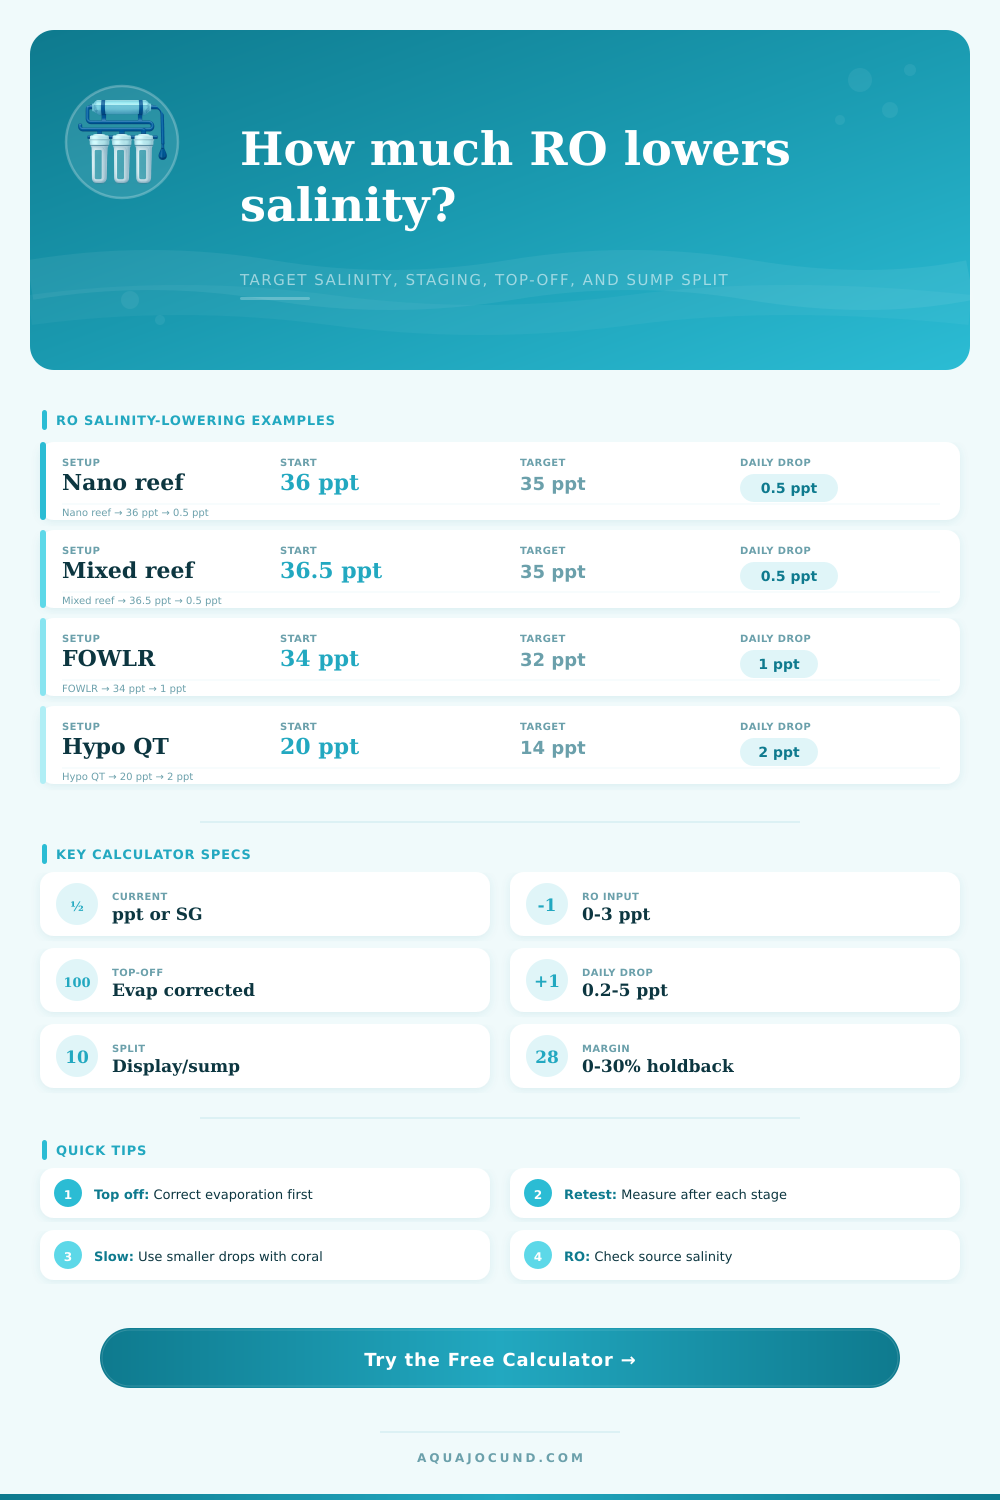
After being away for the weekend or simply ignoring the water line for several days, I’m sure you’ve seen that abrupt spike appear when checking the refractometer. Salts concentrate into a brine as evaporation occurs, stressing sensitive clam and coral species in a matter of hours. Grabbing a bucket of fresh RO/DI seems like an obvious solution, but dumping everything at once will result in osmotic shock. This is where the device pictured above come in.
It does all the complicated math for mixing efficiency and volume displacement. This lets you keep an eye on your livestock while calculating exactly how much low-salinity water you’ll need to safely dilute your system.
How to Safely Lower Salinity in Your Tank
Before you do anything, however, the single most important factor to adjust for is evaporation. Evaporation do not add more saltwater; it just leaves behind more concentrated salts because the water has dissapears. So how can you know what’s a safe drop when you don’t even have the right volume in the tank? Don’t treat evaporative loss like a higher salt exchange need. Before running the calculator, top-off with pure RO/DI water until the water line is back at normal. Normalizing initial salinity will save you a bunch of headaches down the road and prevent overshooting your goal.
Once the volume is normalized, it’s time to set the speed of transition towards your target. For sensitive animals such as clams and small polyp stony corals (SPS), there is little margin for error… usually less than 1/2 a point per day in each direction. Fish-only tank will be much more accommodating and can support swift transitions of up to 1-2 points a day. If needed, the calculator stages the water exchange over several days based off these profiles. It calculates total amount of volume changes in small steps. It also considers your desired safety margins so your fish do not experience rapid osmotic shifts that lead to death or tissue recession.
The other thing most hobbyists don’t think about until it’s too late is exchange efficiency. You’re never going to get 100% of every gallon out of the tank when draining and 100% of every gallon in when topping up. Your “real world” mixing (e.g., slow return pumps, dead zone behind rockwork) can cause your actual salinity change to lag behind your calculated salinity change. The efficiency slider lets you take into account this “real world” lag in mixing. For example, if you set the efficiency down, you’ll need to pull out just a bit more water to get the same diluting effect. It’s a tiny tweak on the input that results in a giant leap forward in accuracy.
Next, you need to decide where the exchange will happen. Is it in a separate tank (i.e., sump)? This reduces stress on living things in the primary tank and allows you to adjust settings within the auxiliary loop. Alternatively, if you have no sump and just a small tank with some fish, then you must interact directly with the display. Based on your system configuration, the calculator will divide up the volume that needs to be processed between the display and the sump to avoid stressing your living creatures as much. This can be particularly helpful to reefers who wish to drop the salinity for treating an illness such as quinine treatments via hyposalinity but don’t want to expose their fragile frags to fluctuating flow changes.
You must retest. All meters will drift and refractometers has tolerances despite perfect math. There’s a little bit of a safety holdback margin in the calculator, it saves a tiny bit of your intended correction until you check the result. That means don’t dump all the water calculated into the tank at one time. Buffer yourself. Test it in a couple hours. Are you good? Stop there. Are you too high? Use what you’ve reserved. Testing step by step is better than aggressive guessing each time.
While there’s no magic bullet with salinity management, it’s more of an exercise in observation and patience different than exact chemistry. Your eyes are better tools than any readout and you know when to stop just by looking at a calm fish or longer tentacles on a soft coral. Treat the mathed out volumes as a guidepost only, not a commandment. Tweak according to how your livestock react between steps. If everything looks good, push a little harder. If everything seems lethargic, slow down and let ‘er get used to it. You should of been careful with transitions.
To sum up, reducing the salinity safely depends on more than simply reaching a specific numerical value, it depends on doing so at a safe rate of change. The calculator is your roadmap; you’re still driving the car. In the aquarium hobby, slow and steady wins the race. If you can be patient enough not to spike the salt, you will also be patient enough to get it back down again.