Reef Temperature Stability Calculator
Estimate reef tank thermal mass, heating capacity, cooling effect, daily temperature swing, stability score, and outage buffer.
Temperature Stability Results
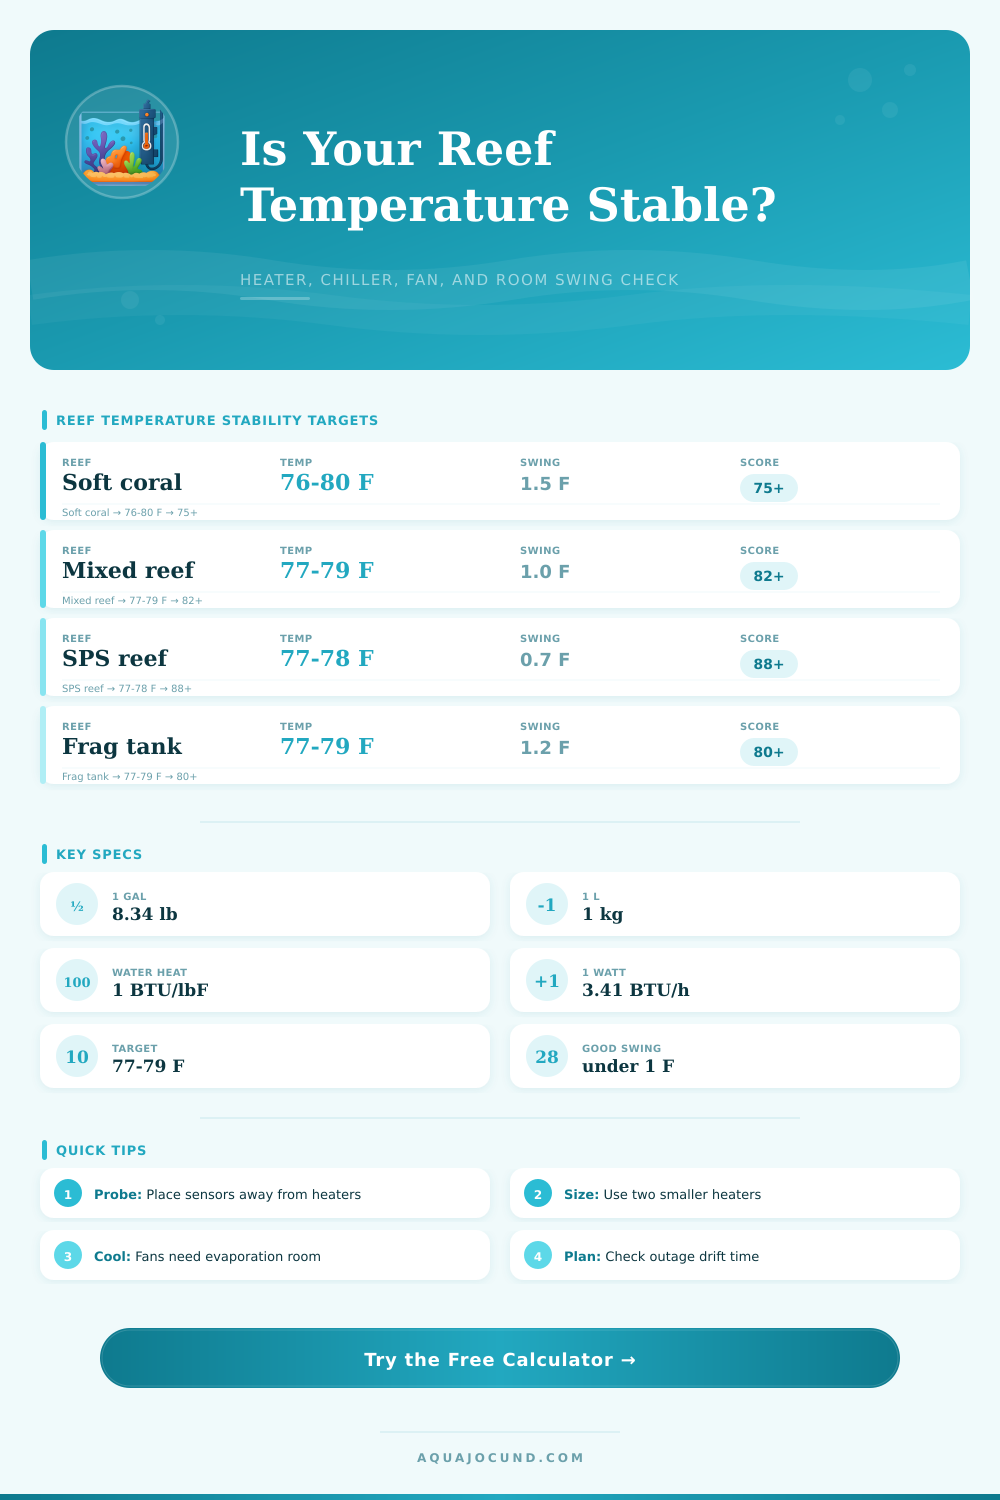
| Reef Type | Typical Target | Good Daily Swing | Control Priority |
|---|---|---|---|
| Soft coral nano | 76-80°F / 24.4-26.7°C | 1.0-1.5°F | Heater redundancy and stable room |
| Mixed reef | 77-79°F / 25.0-26.1°C | 0.7-1.0°F | Balanced heater and fan control |
| SPS dominant | 77-78.5°F / 25.0-25.8°C | 0.4-0.8°F | Controller, alerts, and cooling headroom |
| Frag grow-out | 77-79°F / 25.0-26.1°C | 0.8-1.2°F | Shallow tank cooling and evaporation |
| Large display | 76.5-79°F / 24.7-26.1°C | 0.5-1.0°F | Thermal mass plus equipment planning |
| Device | Useful For | Capacity Rule | Watch Point |
|---|---|---|---|
| Single heater | Small, simple systems | 3-5 watts per gallon | One stuck relay can overheat |
| Dual heaters | Most reef displays | Split total watts evenly | Each heater should not cook tank alone |
| Evaporative fan | Warm rooms and open tops | Best with dry air and ATO | Raises daily evaporation demand |
| Inline chiller | Hot rooms or strong lights | Match BTU/h to heat load | Needs flow, ventilation, and cleaning |
| Room HVAC | Whole-room stability | Reduces room swing pressure | Outages remove both heat and cooling |
| System | Total Water | Typical Heat | Temperature Risk |
|---|---|---|---|
| 20 gal nano | 18-22 gal / 68-83 L | 75-150 W heater | Fast drift from room changes |
| 32 gal AIO | 28-32 gal / 106-121 L | 100-200 W heater | Back chamber hides hot spots |
| 40 breeder frag | 35-45 gal / 132-170 L | 150-250 W heater | Shallow tanks warm quickly |
| 75 gal with sump | 85-100 gal / 322-379 L | 250-400 W heater | Often stable if room is controlled |
| 120 gal SPS | 130-160 gal / 492-606 L | 400-600 W heater | Lighting and pumps can add heat |
| 180 gal display | 200-240 gal / 757-908 L | 600-900 W heater | Slow drift, high total energy need |
High Stability
Moderate Stability
Low Stability
Temperature stability matter, because letting your aquarium’s temperature fluctuate two degrees overnight is the single most costly mistake you can make in reef keeping. What was once a thriving ecosystem now become a stress test for all those heads of coral in your tank. A couple degrees doesn’t seem like much but it turns a thriving ecosystem into a stress test for every coral head in your tanks.
Thermal stability isn’t about hitting an exact number on your thermometer. It’s about eliminating the day-to-day swing so that your livestock never notices the difference between night & morning. Using heating/cooling capacity, heater headroom, and total thermal mass, the calculator above show how stable your system is. That will give you a solid idea of just how safe your system is.
Why Temperature Stability Is Important
What about the water? It holds a lot of heat. That is to say, it doesn’t want to change temperature easy. And that’s one reason bigger systems are typically easier to stabilize than smaller ones (e.g., nano tanks). A hundred gallons of water won’t take up or shed energy as fast as twenty will. So when the tool asks for your sump and display volume, that’s what you’re describing. That’s your thermal battery. All that water is considered just one big lump of heat storage in math.
The bigger your sump behind the rack, the more it serves as an additional buffer against sudden changes in room temperatures. Even if your display tank is shallow, having a lot of volume in your system show up as a better score because you’ve increased amount of water that must be warmed or cooled to shift the system. Increasing the volume of water is essentially buying insurance against thermal shock.
Heaters also affect response time. A single large heater are going to turn on and off with a big change in temperature. That means wider swings vs having two smaller heaters split the load. This is reflected in the tool which asks for how many heaters you have as well as the total wattage. Having multiple heaters provide a finer control grid. You can maintain a narrower temperature range by shutting heaters off or cycling them out, overshooting becomes less of an issue. Redundancy > Raw Power. Most seasoned keepers prefer redundant heaters over raw power because they smooth out the thermostat behavior. You don’t want big changes in water from the heater you want small ones.
These days with all of our appliances making waste heat, cooling tends to be the trickier problem in a reef room. Even though LEDs are “efficient” light fixtures, they also dump heat into the room air where it will transfer to the tank water if the room gets overly warm. The calculator lets you estimate how your inline chiller or evaporative fan can offset this load based off your room’s peak temp.
An evaporative fan works by evaporating some water to lower the surface temperature, so it needs to have dry air and an auto top-off system to work effectiveley. Fans don’t do as good of a job when the room air is humid. A chiller does a better job of keeping things consistent but eats up a bunch of electricity and has to be cleaned regularily to avoid a build-up of bacterial sludge.
What does that daily swing tell you? That’s the story of what your environment is really doing. For a stable reef, less than a degree (Fahrenheit) fluctuation in 24 hours are good. If you have SPS corals, they will demand closer to half a degree or less. This means that if you calculate yourself into a lower number, you know you need better equipment. That equipment must be capable of handling the heat load or room temperature fluctuations. The reference tables come with the tool which lays out those targets for you to use as a guide of what works best for your particular livestock.
And lastly, what about if the power goes out? How long will it take for your tank to stray from safe waters in the event of a power failure? That’s the emergency buffer metric. The bigger the thermal mass, the longer you’ve got until you need to do something about it. And that’s the number that gives you peace of mind on hot summer days and stormy nights. Knowing you have four hours of emergency breathing room rather than only 40 minutes will change how prepared you are for those emergencies. When you know precisely how much buffer your water has over the outside world, you can rest easier.
Stability isn’t some magical voodoo thing. It’s simply applying good physics with care to a glass box filled with living things.