Pond Edging Length Calculator
Estimate pond perimeter, edging length, roll count, joint overlap, and stake spacing for straight or curved pond borders.
Edging Estimate
| Material | Typical Piece | Joint Allowance | Best Pond Edge |
|---|---|---|---|
| Flexible plastic roll | 20 ft / 6.1 m | 6 in / 15 cm overlap | Gentle curves and small garden ponds |
| Aluminum landscape edging | 8 ft / 2.4 m strips | 4 in / 10 cm splice | Clean formal edges near patios |
| Galvanized steel edging | 16 ft / 4.9 m strips | 4 in / 10 cm splice | Long straight runs and firm soil |
| Rubber liner cap edging | 25 ft / 7.6 m roll | 8 in / 20 cm overlap | Soft liner rims and natural curves |
| Timber board edging | 8 ft / 2.4 m board | 0 in butt joint | Rectangular raised pond borders |
| Stone or block coping | 1 ft / 0.3 m module | 0 in module gap | Visible hardscape pond rims |
| Corten steel edging | 8 ft / 2.4 m strips | 4 in / 10 cm splice | Decorative modern pond borders |
| Precast concrete curbing | 3 ft / 0.9 m sections | 0 in butt joint | Heavy permanent pond edging |
| Pond Type | Size | Approx. Perimeter | Typical Order Length |
|---|---|---|---|
| Small patio rectangle | 6 ft x 4 ft / 1.8 m x 1.2 m | 20 ft / 6.1 m | 23 ft / 7.0 m |
| Round fountain pond | 6 ft / 1.8 m diameter | 18.9 ft / 5.7 m | 22 ft / 6.7 m |
| Oval koi pond | 12 ft x 8 ft / 3.7 m x 2.4 m | 31.7 ft / 9.7 m | 37 ft / 11.3 m |
| Wildlife kidney pond | 14 ft x 9 ft / 4.3 m x 2.7 m | 39.8 ft / 12.1 m | 47 ft / 14.3 m |
| Large garden pond | 20 ft x 12 ft / 6.1 m x 3.7 m | 51.0 ft / 15.5 m | 60 ft / 18.3 m |
| Shape | Formula Used | Good For | Note |
|---|---|---|---|
| Rectangle | 2 x (length + width) | Formal or raised ponds | Most accurate for straight sides |
| Oval | Ramanujan ellipse estimate | Oval koi and garden ponds | Uses length and width as axes |
| Round | pi x diameter | Fountain and bowl ponds | Add set-back for outer edging |
| Kidney | Ellipse perimeter x 1.08 | Freeform wildlife ponds | Extra curve factor included |
| Measured | Entered perimeter | Irregular pond borders | Best after hose layout |
This calculator estimates edging quantity from geometry and common installation allowances. Check the actual product instructions for connector hardware, stake counts, and minimum bend radius.
All the problems start with the rough rim. The rim sets the stage for everything that comes after. It’s the frame of the whole water feature. You spent weeks digging hole and wrestling liner into place, only to end up with a mess on the outside. Ouch!
A nice straight, clean rim give even a little pond a purposeful feel. A sloppy one makes my hard work look like construction zone.
How to Measure Your Pond Rim
Once you enter your dimensions, calculator does the work for you. It transforms a vague plan into real shopping list.
Now how do you know what you’re looking at? What are you measuring? It is not simply length of the water’s edge. There’s the set-back too. How far out does the edging sit beyond the waterline to keep liner protected?
That adds length and people frequentely forget this in their calculations. For example, let’s say your pond is eight feet wide by a dozen feet long. So the perimeter of the base are forty feet. But if you have a three-inch lip all the way around, you add about two feet to that number. Small yes, but it matters.
When you choose a shape the tool will automatically adjusts the geometry for you. That is your baseline, though. That is your starting point, but it is not your final result.
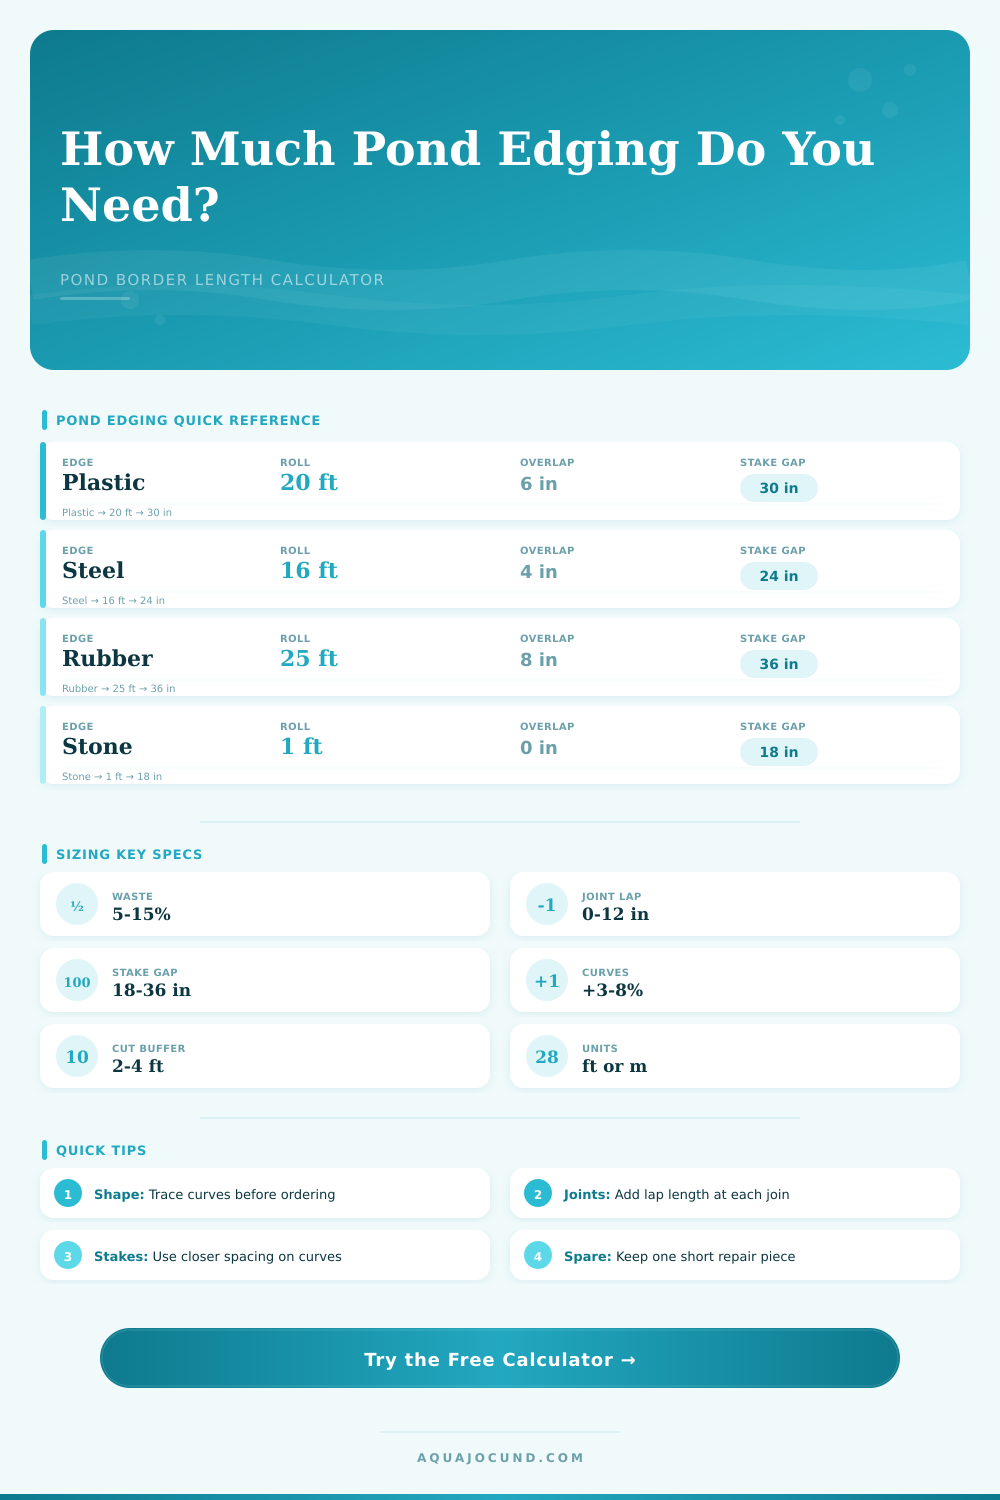
Then there’s the fact that materials makes all the difference. Rolls of flexible plastic are cheap; however, they’re sold in 20-foot lengths, which must be spliced. Stiff aluminum or steel strip cost more but is typically available in 16-foot increments. Coping made from stone come in modules, each measured individually.
To account for this, the calculator prompts you to specify what sort of material you’re using, and thus how much joint overlap to assume. Two sheets of plastic edging won’t fit snugly up against one another. Six inches minimum overlap ensure security against water pressure and soil movement. Four inches may suffice with steel. That uses up your total usable length. If you fail to account for it, you’ll discover you’re three feet short at the final stages of installation.
And then there are the anchors. Stakes keep edging in place; they don’t glue it to the ground. How far apart should you space them? Closer together provides greater stability, particularly on curved lines. For a straight edge, every half foot (thirty inches) is sufficient. On a snugly curving line, you might need them every eighteen inches.
That’s where the math comes in. The calculator approximates how many stake you’ll need by adding up overall distance and factoring in the spacing you select.
Here’s where folks mess up: They purchase their edging without considering hardware required. Soon you’re driving all over town, searching for galvanized U-nails or staples, visiting at least three stores before finding what you seek. It is an annoying little hiccup that adds up to an afternoon wasted.
The last cushion is waste allowance. There’s never a perfect cut. You’ll mess up. You’ll cut something too short and need to go back to square one. A good rule of thumb is to allow for ten percent waste (this number goes up if your design is more free form and has curves), but I’d actualy increase it to fifteen percent if you’re dealing with a complicated curve like a kidney shape. Cutting errors and friction caused by curves add to waste; straight lines don’t.
The waste allowance can be edited on the calculator, but be careful not to get greedy. It’s better to order too much than to little. An extra roll of edging isn’t difficult to stash. You might not have enough when you come back for a section in middle of summer. That requires tearing out finished pond and hoping they still have a match.
This is laid out on the page with a reference table for popular materials. The table indicates typical stake gap spacing and roll length. This way, if the calculator tells you 4 rolls of plastic for a small patio pond, you can use the table to check your work. You can see if that number is about right for the typical piece length.
You want them all in one trip. Measure twice, cut once, let the tool do the math for you.
Ponds that appears to grow there naturaly are always the best. The border stays precisely where placed.