Iwagumi Stone Ratio Calculator
Size oyaishi dominance, secondary stones, golden-ratio placement, visual mass, odd-count rhythm, and open negative space.
Iwagumi Ratio Results
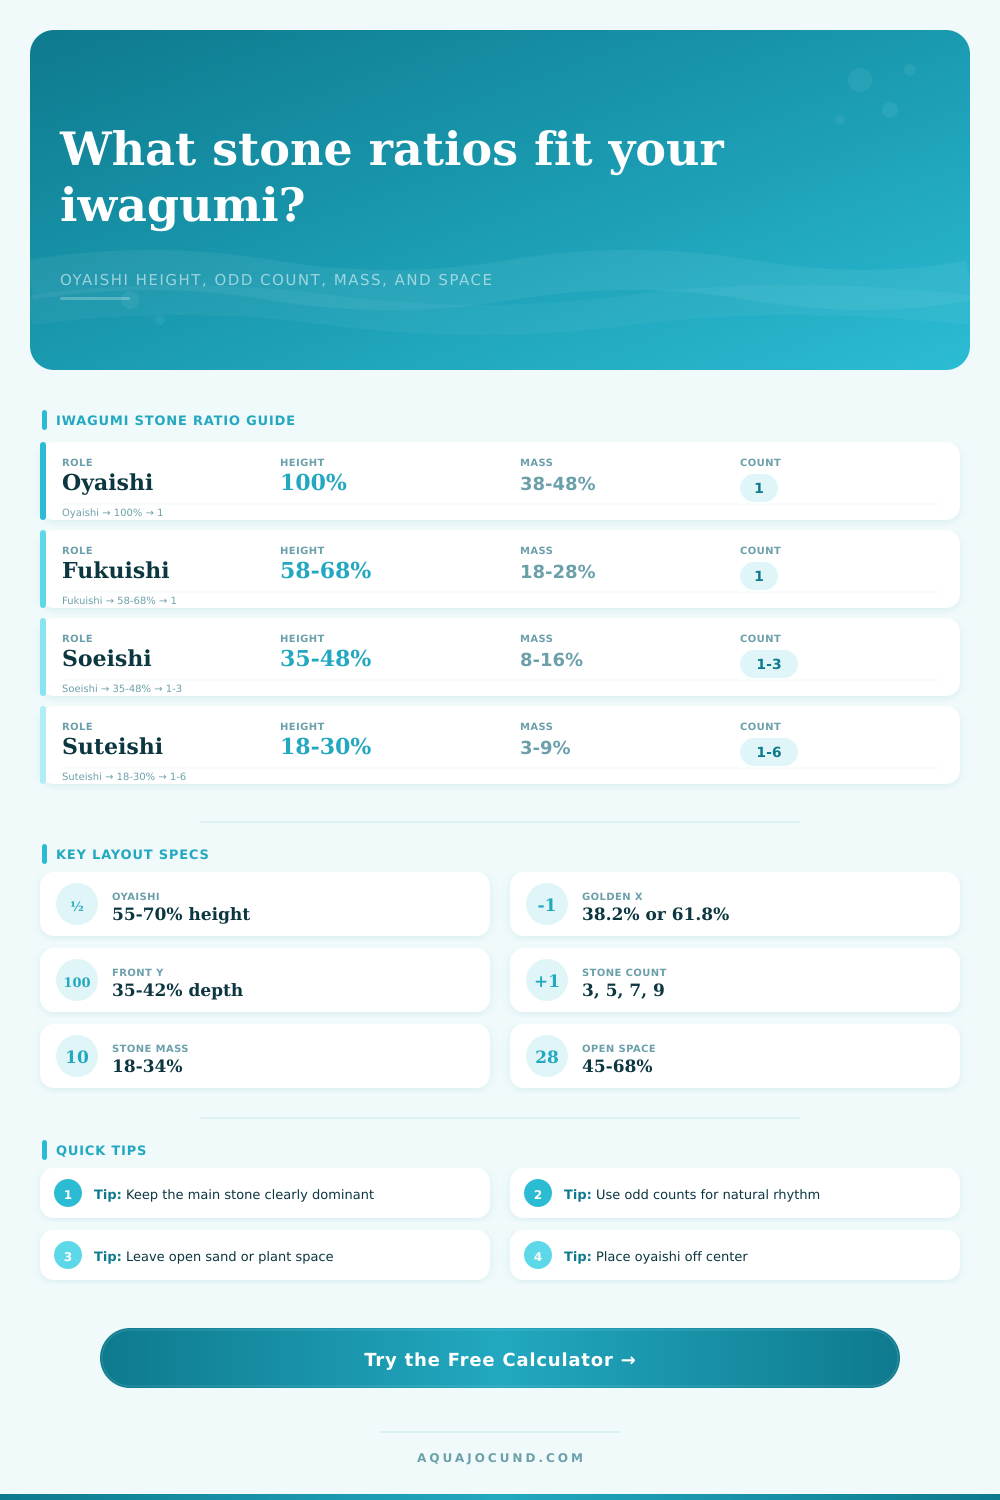
| Stone Role | Height Ratio | Visual Mass Share | Typical Count | Placement Job |
|---|---|---|---|---|
| Oyaishi main stone | 1.00 | 38% to 48% | 1 | Anchors the golden point and tallest line. |
| Fukuishi supporting stone | 0.58 to 0.68 | 18% to 28% | 1 | Supports the main lean without competing. |
| Soeishi companion stones | 0.35 to 0.48 | 8% to 16% | 1 to 3 | Pulls the eye through the composition. |
| Suteishi sacrificial stones | 0.18 to 0.30 | 3% to 9% | 1 to 6 | Completes rhythm and partly disappears into planting. |
| Tank Format | Dimensions Imperial | Dimensions Metric | Footprint | Common Iwagumi Count |
|---|---|---|---|---|
| 5 gal nano | 16 x 8 x 10 in | 41 x 20 x 25 cm | 128 sq in / 826 sq cm | 3 or 5 stones |
| 10 gal standard | 20 x 10 x 12 in | 51 x 25 x 30 cm | 200 sq in / 1290 sq cm | 5 stones |
| 20 gal long | 30 x 12 x 12 in | 76 x 30 x 30 cm | 360 sq in / 2323 sq cm | 5 or 7 stones |
| 60P rimless | 24 x 12 x 14 in | 60 x 30 x 36 cm | 288 sq in / 1800 sq cm | 5 to 9 stones |
| 40 breeder | 36 x 18 x 16 in | 91 x 46 x 41 cm | 648 sq in / 4181 sq cm | 7 or 9 stones |
| 75P wide | 30 x 18 x 18 in | 75 x 45 x 45 cm | 540 sq in / 3375 sq cm | 7 to 11 stones |
| Stone Type | Visual Density | Edge Character | Mass Adjustment | Layout Note |
|---|---|---|---|---|
| Seiryu / Ryuoh | High | Sharp veins | 1.12 | Reads large; leave extra negative space. |
| Ohko / dragon | Medium light | Porous texture | 0.92 | Can use more stones without feeling heavy. |
| Black lava | High dark | Rough pores | 1.18 | Dark mass feels heavier from the front. |
| Layered slate | Medium | Flat planes | 1.00 | Strong direction lines need consistent lean. |
| Granite boulder | High | Rounded blocks | 1.08 | Use fewer, stronger stones. |
| River stone | Low medium | Soft rounded | 0.88 | Needs careful height contrast for drama. |
| Visual Mass | Negative Space | Best Use | Risk | Adjustment |
|---|---|---|---|---|
| 16% to 22% | 60% to 72% | Minimal meadow or nano layout | Main stone may feel lonely | Raise oyaishi or tighten companion stones |
| 23% to 30% | 50% to 62% | Classic balanced iwagumi | Usually low | Preserve one clear open foreground |
| 31% to 38% | 42% to 54% | Mountain ridge or dramatic slope | Can feel crowded | Reduce small stones or widen open sand |
| 39% to 48% | 32% to 44% | Bold rock face layouts | Hardscape overwhelms planting | Lower mass or split rear support stones |
The objective here is to build a Japanese mountain scene from scratch, starting with an empty aquarium.
When you compare that to collection of random rocks, what is the difference? Ratio. When you compare that to a collection of random rocks, what is the differnce? Ratio. What may appear as simple rock gardening in iwagumi aquascaping are actualy a strict application of negative space and geometry.
How to Arrange Rocks in Your Tank
To make it easier, there’s this calculator. It performs all calculation for you. If you input your tank size and choice of stones, it will spit out a structured design for you. It manages proportion while you manage art.
That said, you should know this: Dominance isn’t measured by how many rocks you have. Its measured by how they relates to each other (size hierarchy). The main stone (oyaishi) is any well-balanced composition’s largest component. It must absolute dominate.
When the second stone (fukuishi) closely match the size of the main stone, the scene become muddled. Instead of one clear focal point backed by a supporting cast, it feel more like two contenders vying for first place.
Use this tool to confirm whether your proposed main stone will be about half-to-two-thirds the height of water column. That way it demands notice while avoiding an appearance as if it’s been planted in pit of sand. Your eye should instantly land atop it, all else is background.
There’s more to it than height. The position of the stone also play an important role. Many people puts their primary rock in the exact middle of the tank. While it certainly looks nice, it also make the tank look static and symmetrical.
In nature, things aren’t always perfect mirrors. Using the golden ratio, you place the focus of the tank off center. This adds movement and tension. That’s what this calculator does with your own tank width. Whether you have a wide panoramic display or a narrow nano cube, it will tell you precisely where that visual anchor should go. You won’t need to worry about your tank layout feeling like posed photograph.
You also have the option to change stone count. An even number of stones isn’t as effective than an odd number. A 3,5,7 or 9 creates a natural cadence. Depending on your planned number of stones, the calculator will change what it expect.
For example, a three stone setup require each rock to be visually heavy. Nine stones leave space for accents that is spread out and less prominent. Using more large rocks in a limited footprint makes the area feel cramped and claustrophobic. The calculator provides a visual mass score to help keep you honest. It’ll alert you if there’s too much hardscape for fish and plants.
The appearance of the stone itself also affect the visual weight. For example, rough, angular stone such as Seiryu appears heavier and larger than rounded, smoother river rocks. Dark colored lava rock will create a denser look different than light colored Ohko stone.
The visual density is factored into the calculator. It increases/decreases the recommended percentage of mass based off this visual density. The darker or heavier your stone looks, the more negative space you need to let the composition breathe. Stones that look lighter or more porous allow you to use a few more rocks. It’s a subtle adjustment but makes all the difference in the final mood.
Negative space isn’t just empty area. Negative space is an active part of the design. That’s how the rocks has somewhere to rest. They’re framed by the plants or the sand that make up the foreground. If there was no sand or plants, then what? There’d be nothing for the rocks to rest on.
The thing with this approach is that you want the hardscape to occupy roughly a quarter to a third of your visual field. Your calculator can help you zero in on that balance. Leave the remainder as open space. This restraint is what differentiates a pro layout from someone who’s tinkering.
You don’t try to fill up the tank, you try to create silence and arrange it. When you’ve got the ratios locked in, all you do is place the pieces. Math gets you to the finish line; your eye finishes the job.
You should of used this sooner.