Emergency Drain Size Calculator
Check emergency pipe diameter, gravity capacity, return pump flow, clog margin, drain height, standpipe type, freeboard, and safety factor.
💧Return flow and emergency demand
Used for turnover context only; emergency capacity is driven by return pump flow.
Enter real flow after head loss, valves, reactors, and return plumbing.
🔧Emergency standpipe and freeboard
Head is the water rise above the emergency intake during the blocked-main test.
Submerged and horizontal outlets trap air, slow open-channel emergencies, and reduce useful capacity.
Emergency Drain Breakdown
📊Drain size and configuration comparison
📘Emergency drain reference tables
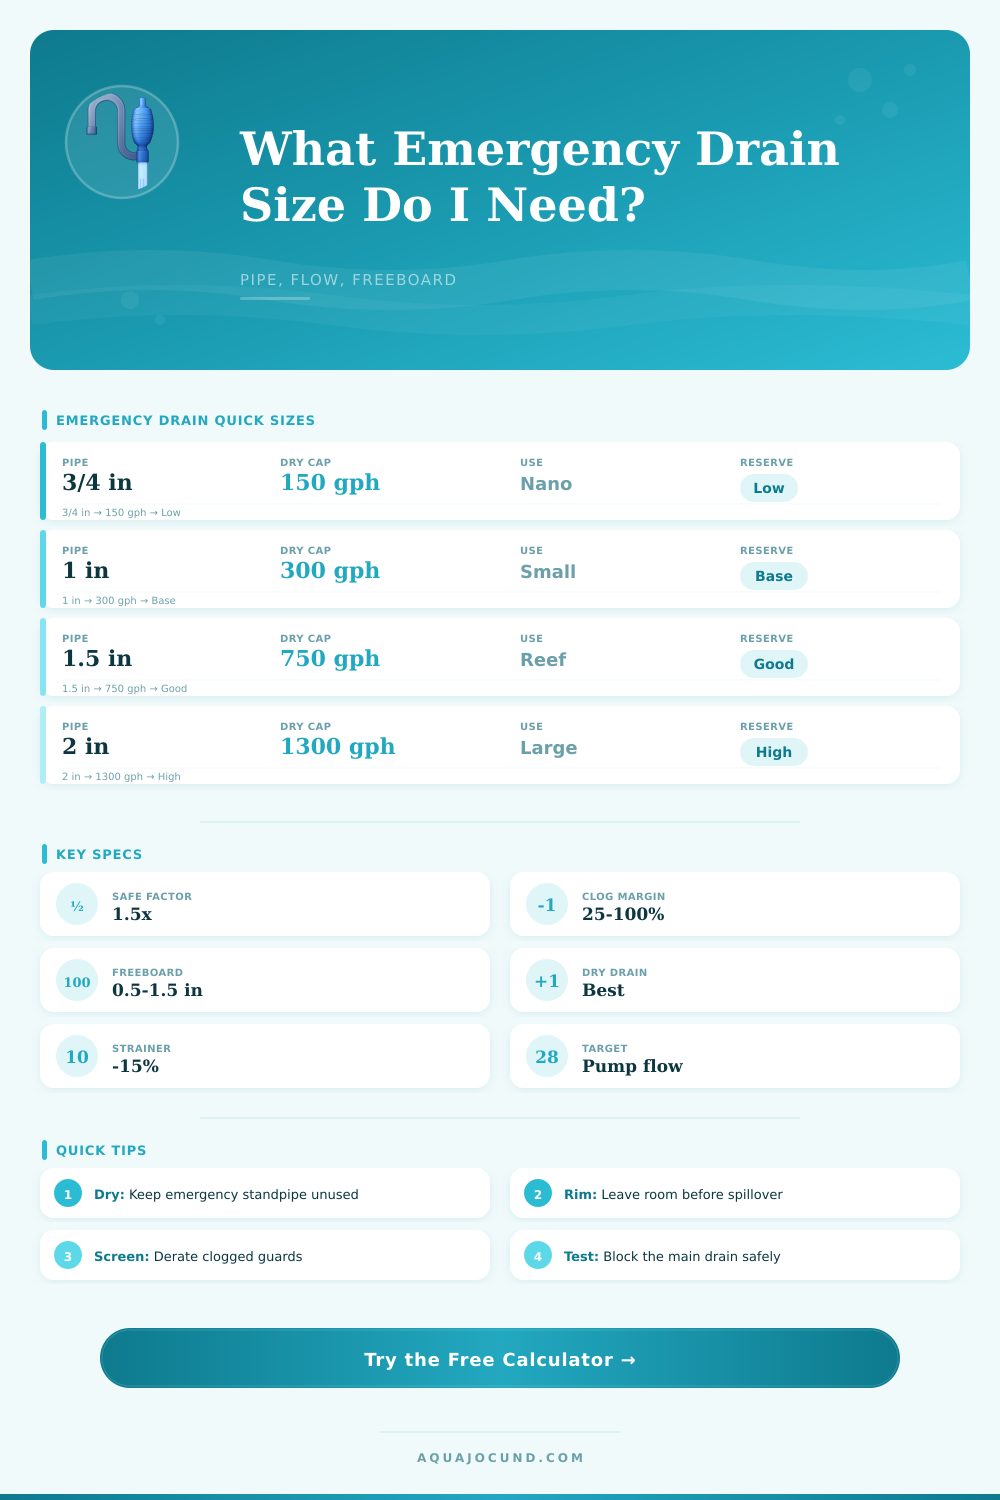
| Nominal pipe | Inside diameter used | Dry emergency base | Best aquarium use |
|---|---|---|---|
| 3/4 in / 20 mm | 0.82 in / 21 mm | 150 gph / 568 L/h | Nano and low-flow AIO returns |
| 1 in / 25 mm | 1.05 in / 27 mm | 300 gph / 1136 L/h | Small reef or single Durso backup |
| 1 1/4 in / 32 mm | 1.38 in / 35 mm | 500 gph / 1893 L/h | Mid-size mixed reef return |
| 1 1/2 in / 40 mm | 1.61 in / 41 mm | 750 gph / 2839 L/h | Common dry emergency for reefs |
| 2 in / 50 mm | 2.07 in / 53 mm | 1300 gph / 4921 L/h | Large display or dual overflow box |
| 2 1/2 in / 63 mm | 2.47 in / 63 mm | 2000 gph / 7571 L/h | High turnover fish systems |
| 3 in / 75 mm | 3.07 in / 78 mm | 3000 gph / 11356 L/h | Public display and very large sumps |
| Standpipe type | Capacity factor | Failure behavior | Design note |
|---|---|---|---|
| Dry open vertical | 1.00 | Starts quickly with air noise | Preferred emergency layout |
| Upturned elbow | 0.86 | Needs more water rise | Keep the elbow opening clear |
| Screened guard | 0.74 | Protects livestock but clogs | Clean before every flow test |
| Horizontal bulkhead | 0.66 | Air locking is more likely | Needs generous freeboard |
| Shared overflow box | 0.80 | Main-drain turbulence can rob flow | Leave room around the intake |
| Emergency siphon capable | 1.18 | High flow after purge | Do not depend on instant siphon start |
| Tank scenario | Return flow range | Typical emergency | Freeboard target |
|---|---|---|---|
| 10 to 20 gallon nano sump | 80 to 160 gph | 3/4 to 1 in dry pipe | 0.5 to 1.0 in |
| 40 breeder mixed reef | 180 to 300 gph | 1 in dry emergency | 0.75 to 1.25 in |
| 75 gallon reef | 300 to 500 gph | 1.25 to 1.5 in dry pipe | 1.0 to 1.5 in |
| 120 gallon BeanAnimal | 450 to 750 gph | 1.5 in emergency | 1.0 to 1.75 in |
| 180 gallon display | 700 to 1100 gph | Dual 1.5 in or 2 in | 1.25 to 2.0 in |
| Margin setting | Use when | What it covers | Tradeoff |
|---|---|---|---|
| 25% | Clean dry emergency | Small restart surge | Less protection from algae mats |
| 50% | Normal reef sump | Snails, bubbles, minor fouling | Good default for most builds |
| 100% | High livestock risk | Heavy obstruction or tuning error | Usually pushes pipe size up |
| 150%+ | Remote or unattended system | Multiple partial failures | Requires more overflow-box space |
💡Emergency sizing tips
That’s when you hear it; your sump overflow. There’s a particular type of panic that accompanies this sound. Your ears don’t hear gentle gurgling; instead you hear roaring water finding its way out over the rim and on to your floor. You’ve checked the snails, you’ve tuned the main drain, you’ve balanced the return pumps. And still there swims pricey livestock in the tide that doesn’t belong there. That’s what emergency drains are for. They is a necessary insurance policy that no one ever hopes to collect.
The emergency overflow gets installed by most aquarists as an afterthought. “Someone told me I needed one so I put in that little pipe.” In reality though, life doesn’t work like that. Things go wrong and algae mats grows. Snails collect. Power surges turn on return pumps. They ramp up to full force before things stabilize. Your emergency drain has to be able to handle the actual flow rate of your pumps AND have some sort of buffer for what happens when something plugs it up. Otherwise it’s nothing more than a piece of decoration.
How to Size Your Emergency Sump Drain
To size the backup properly, you need to look at the entire picture. That’s where the calculator comes in (above). Rather than guesswork, enter the real-world flow rate of your return pump minus valves and head loss. Why? Because max flows is listed by manufacturers but rarely achieved in the real world. Next, add a safety factor plus clog margin. Fifty percent provides bubble margin and a bit of fouling. Go up from there if you have high algae or worry about unusual surge events. Then the tool will figure out the minimum pipe diameter needed to handle that demand. It will ensure the flow stays below your overflow point in the sump box.
It takes into account something called freeboard, the crucial distance between your tank’s rim and top of your emergency inlet. That’s where most folks misunderstand freeboard. They assume that as soon as the water hits the top of the pipe, then that’s the highest the water will rise. Nope! Before gravity completely takes over and draws the water down the pipe, it actually rises some amount above the intake. So if you’ve got half an inch of freeboard, you’re dangerously close. This is what this calculator determines… Can I run X gallons per minute through a Y diameter pipe without having water rise above that rim?
It takes into account the kind of standpipe you’ll be using too. A vertical pipe open on both ends will flow better different than a horizontal one or one with screens. Screens are used to keep livestock out of being sucked into the pipe, but when they get clogged, that means they will block the flow, sometimes by 25% or even more. Every time you increase safety, you lose capacity. How big should it be? The tool helps you choose based off how it fits into your setup. So maybe your return flow isn’t high and your tank is nano so you can probably get away with something like three-quarter inch pipe. However, if your sump is something like a Herbie 40 breeder that’s set up to run high turnover, you’ll likely need at least an inch and a half (and frequently two) if you hope to have any sort of reserve.
There are reference tables in the tool showing typical capacities for various sizes which serve as a starting point. They are “dry” estimates, so assume the pipes are clean and has no restrictions. Reality is, if you have long horizontal runs, elbows, etc., then your real capacity will be less than these figures. That’s where the fitting/guard questions comes into play with the calculator. It applies reduction factors to bring you nearer to reality.
Now you may ask if it’s worth risking that just to test out the drain. It absolutely is. Block off your main drain for a while and see what happens. Will it trap air in the emergency pipe? Does water rise too quickly? Either scenario means you got trouble. And that’s reflected by the noise tolerance setting on the calculator. When an emergency drain works; it’s LOUD. Roaring and air-locking while clearing the way, an emergency drain makes noise. That’s the price of survival. Don’t attempt to quiet down an emergency drain. Attempt to size it such that it does its job quietly UNTIL disaster strikes and then lets go without hesitation.
In the end, it’s all about plumbing. Plumbing deals with flow under pressure, whether it is pressure from gravity or a failed pump. The physics don’t give a damn about the prettiness of your sump. They just want to know if there’s any restriction, and they want to know what the volume is. These calculations take you from guessing to engineering. When the inevitable happens and either the main drain clogs or fails, the backup system will step up and won’t turn your livivng room into a lagoon. Make that pipe big enough, make it clear, and keep that sucker dry and it’ll save you when you need it most.