🐟 Pond Netting Size Calculator
Estimate net cut size, coverage area, roll panels, seam overlap, and anchor count for koi and garden ponds.
✅ Pond Netting Sizing Results
| Netting Type | Mesh Size | Typical Drop | Anchor Gap | Best Use | Notes |
|---|---|---|---|---|---|
| Fine Leaf Net | 1/4 in | 6 to 10 in | 30 in | Maple leaves, pine needles, and small debris | Needs support if heavy leaves collect |
| Standard Leaf Net | 3/8 in | 6 to 12 in | 30 in | Seasonal pond cover under trees | Good balance of light and debris control |
| Koi Safety Net | 1/2 in | 10 to 14 in | 24 in | Koi jumps, pets, and light predator access | Keep it raised slightly above water |
| Heron Guard Net | 1 in | 12 to 18 in | 18 to 24 in | Visible predator deterrence on open ponds | Works best with taut edges and stakes |
| Heavy Predator Net | 3/4 in | 12 to 18 in | 18 in | Large koi ponds near wildlife corridors | Plan stronger clips and frame contact points |
| Floating Fine Mesh | 1/8 in | 4 to 8 in | 24 to 30 in | Temporary fry, tadpole, or leaf barrier | Use only where fish cannot become trapped |
| Winter Debris Net | 1/2 in | 14 to 20 in | 18 in | Late fall leaves and branch litter | Remove sagging loads before ice forms |
| Pond Style | Water Edge Size | Suggested Drop | Cut Size | Typical Anchors |
|---|---|---|---|---|
| Patio Bowl | 4 x 4 ft | 6 in | 5 x 5 ft | 8 to 10 |
| Small Goldfish Pond | 6 x 8 ft | 10 in | 8 x 10 ft | 14 to 18 |
| Kidney Garden Pond | 7 x 10 ft | 12 in | 9 x 12 ft | 18 to 22 |
| Medium Koi Pond | 8 x 10 ft | 12 in | 10 x 12 ft | 20 to 24 |
| Large Display Pond | 12 x 18 ft | 18 in | 15 x 21 ft | 32 to 42 |
| Round Wildlife Pond | 10 ft dia | 12 in | 12 ft dia | 18 to 24 |
| Condition | Edge Drop | Anchor Spacing | Seam Overlap | Why It Matters |
|---|---|---|---|---|
| Sheltered Patio | 6 to 8 in | 30 to 36 in | 6 in | Low wind allows a lighter perimeter |
| Tree Leaf Season | 8 to 12 in | 24 to 30 in | 8 in | Extra fabric catches debris before it slides under |
| Koi Jump Guard | 10 to 14 in | 24 in | 8 to 10 in | Firm edges keep the net above fish activity |
| Heron Exposure | 12 to 18 in | 18 to 24 in | 10 to 12 in | Tighter anchoring reduces lifted corners |
| Open Wind | 14 to 20 in | 18 in | 12 in | Closer clips help prevent flapping and snagging |
| Shape | Surface Area Method | Perimeter Method | Best Match |
|---|---|---|---|
| Rectangle | Length x width | 2 x length + 2 x width | Formal ponds, framed basins, raised rectangles |
| Square | Side x side | 4 x side | Small raised koi or goldfish ponds |
| Oval | Pi x half length x half width | Ramanujan oval estimate | Naturalistic ponds with smooth rounded edges |
| Round | Pi x radius squared | Pi x diameter | Tubs, bowl ponds, circular wildlife ponds |
| Kidney | Oval area x 0.86 | Oval perimeter x 1.08 | Irregular garden ponds with a pinched waist |
Fall turns the maples back there into red. The message to you: Pond is about to be filled with rotting plants unless you do something now. So most folks take a hunk of netting from hardware store, drape it over the pond, and hope it works. What happens? Saggy sections of netting catches leaves on top of the liner. And worse; the netting catches and entangle koi in the corners.
The size matter, but not just so that your netting covers the hole in the ground. It also must form an envelope that will protect the fish (and your sanity)… During weather events.
How to Use the Pond Net Calculator
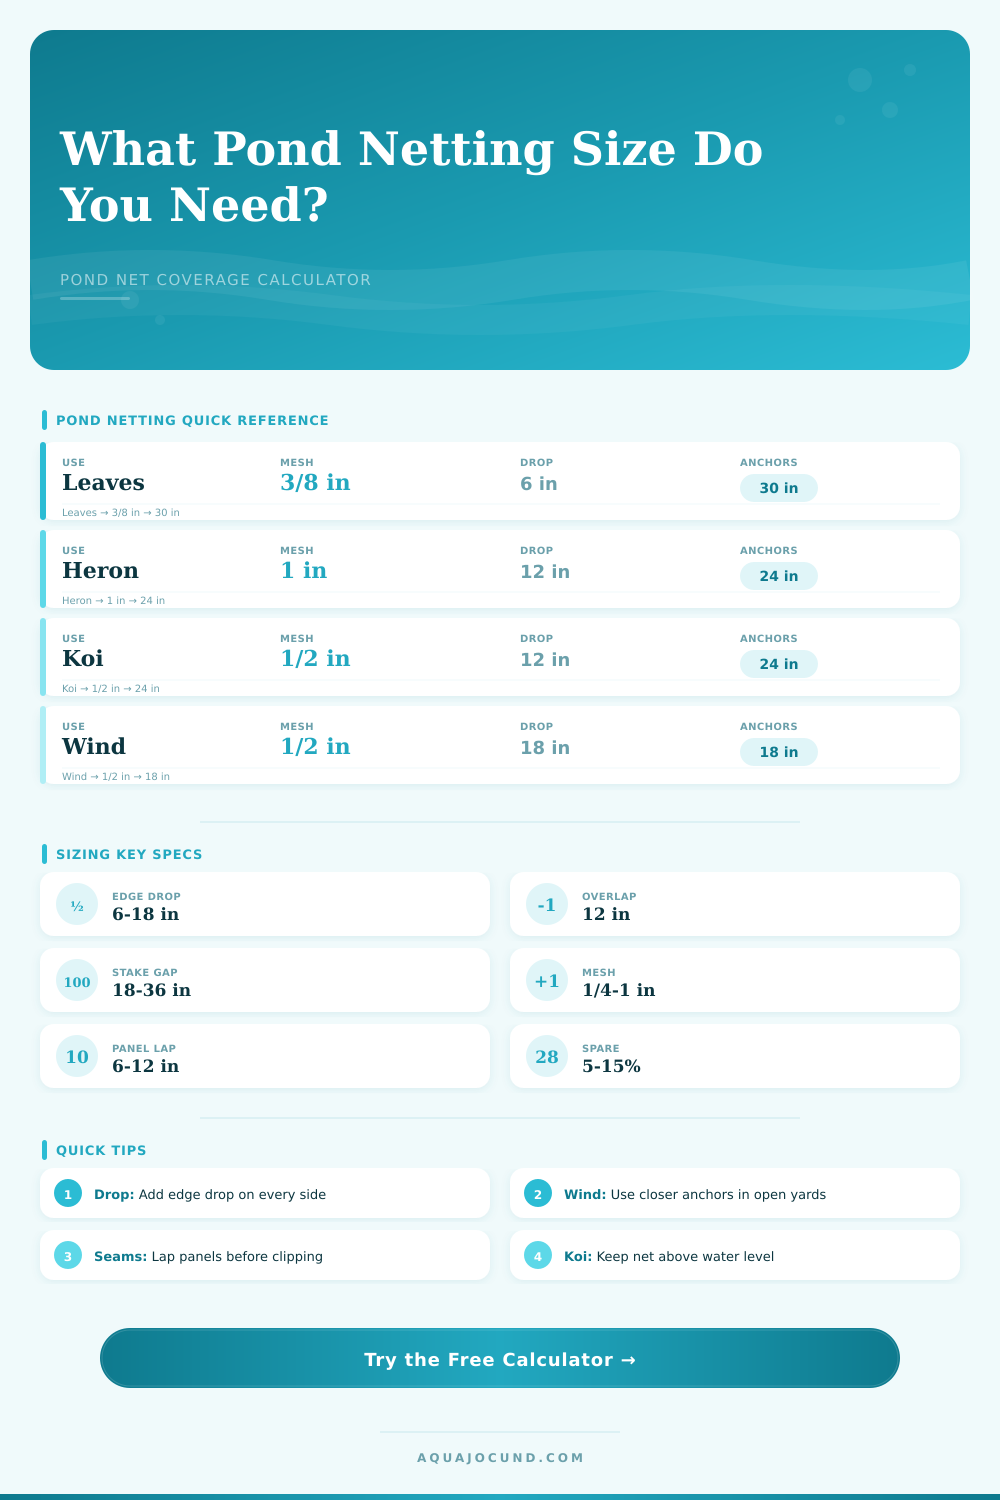
To prevent having to guess at the waste factor, I found this tool (above) to handle the geometry. All you enter is actual width of the netting roll you purchased plus the shape of the pond, and it spits out how many panel you’ll need to join. Why does that matter? Most of these rolls comes in only fourteen feet wide, which isn’t quite big enough for an average-size garden pond. To cover a wider one, you must sew two together. The calculator determines exactly where to place that seam and how much overlap to provide for strength. It also factors in the drop along edge. That’s the excess fabric you allow to dangle over the bank, which you then pin down. Otherwise, the wind catches the edge and blows the entire cover into the next yard. Depending on how steep your banks are, you’d like at least six to eighteen inches of drop.
Typically, the mistake is selecting the wrong mesh size. The fine one sounds good; it catches all the tiniest pine needles and whatnot. But fine mesh weigh like a brick, sponging up every drop. So if you have trees hanging overhead… Especially maples and oaks, heavy producers of leaves, a heavy rain will make that fine leaf net dangerously saggy. It’ll start pulling the mesh into the water itself, making slurry mess that quickly ruins your water quality. For those situations, a little bigger mesh allow water to flow through but traps most of the material.
Curious cats? Or maybe more so: herons? Then the goal for the mesh size changes: you need something that provides a visual barrier but is strong enough to hold up against a bird trying to get a foothold on it. The tool’s reference table lays this stuff out nicely, helping you see what mesh to match to what type of threat.
The other variable that seems like it should be intuitive but is often underestimated is wind exposure. If you’re anchoring a pond in a protected courtyard, you can space anchors thirty inches apart. But if you throw that same pond into an open field without any kind of wind break, now you’re going to have to use anchors every eighteen inches. Your wind setting will determine how many anchors the calculator recommends for your setup, thereby saving you the embarrassment of purchasing fifty clips only to discover upon unpacking them that you actualy require eighty. It is a minor logistic detail, but it also keeps the net from flapping around, which is usually what tears the material over time.
The number one mistake is trimming it to fit exactly across the surface of the water. The edge of the water isn’t always a rectangle. And even if it were, it’s not perfectly straight. There are plants, rocks, and lumps in the soil. The margin setting is there to account for these things. A practical margin of ten to fifteen percent will give you just enough slack to pull the net over an edge or tuck into a big hole behind some rock. It’s far better to have too much to cut off versus running short somewhere along the corner. You could of fixed a shortage once the net is on and pinned down.
The last key to making this system successful is to set the net tight. Don’t make it so tight that it is drum-tight like a mainsail on a sailboat. It should also not be so loose that it sag into the water. Tight enough to allow leaves to lie on top without sliding off the edge and loose enough that it doesn’t tear when a twig falls onto the net. The calculator will determine how many panels and how far apart the anchors need to be set. Your hands is what finally make the adjustments. Starting at the middle and moving outward toward the edges, clip as you go.
It is a little laborious in the fall, but it’s well worth it since you won’t spend any time in the spring scooping sludge out of your pond. That’s all the return you’re concerned with anyway.