Aquarium Water Column Height Calculator
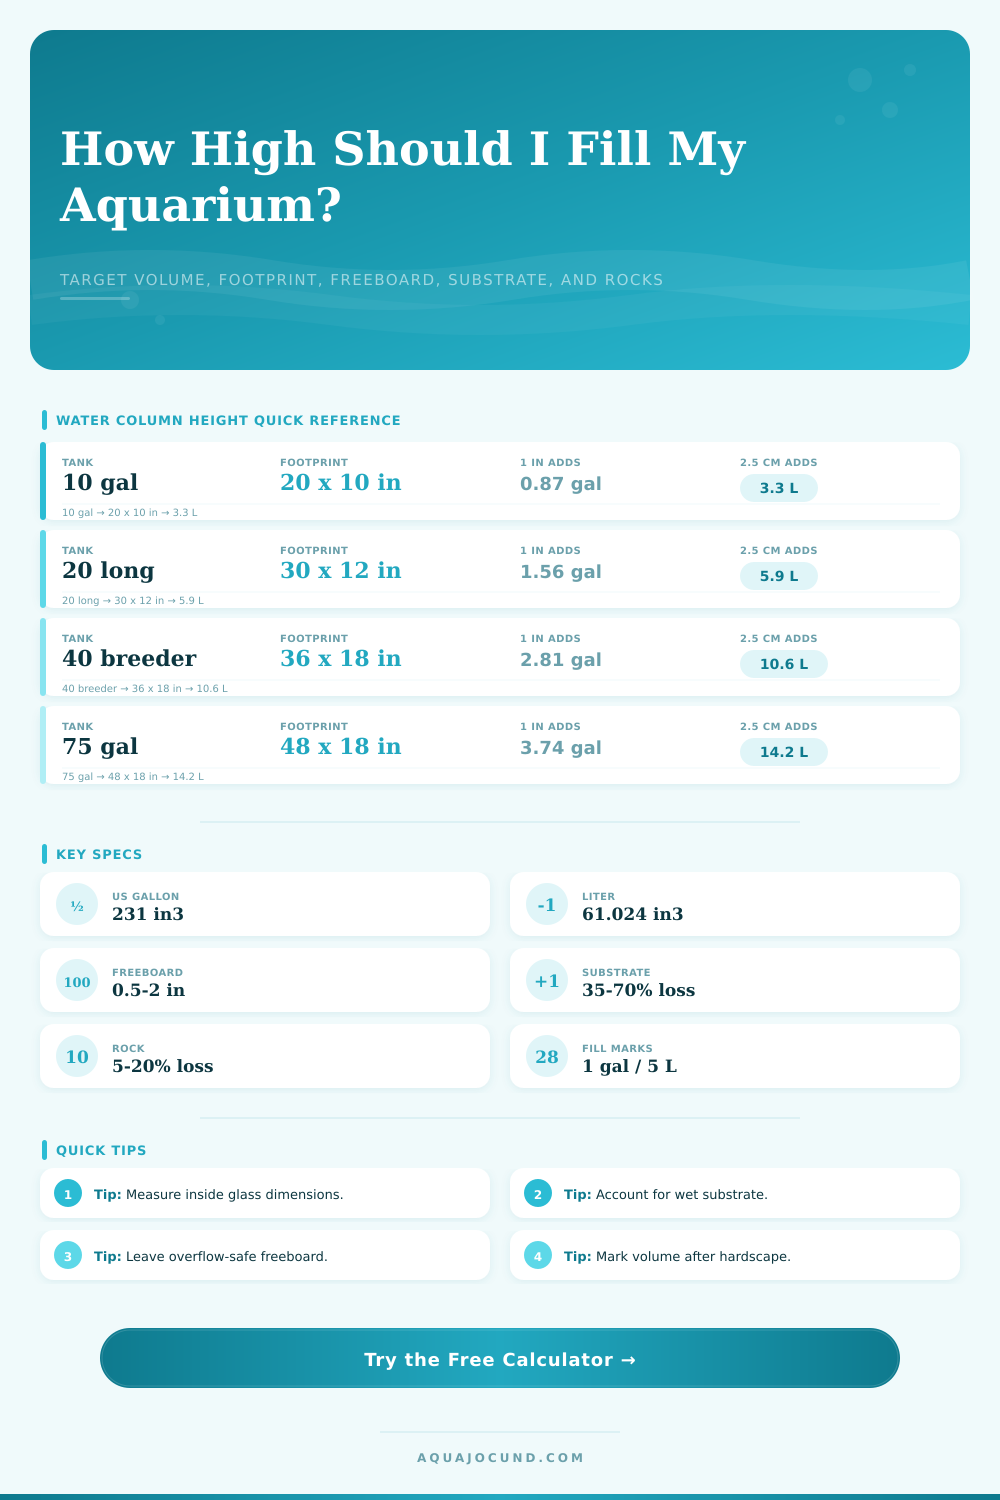
Convert a target net water volume into fill height, freeboard, tank footprint volume per mark, substrate loss, and rock displacement.
💧Fill Height Presets
📏Target Volume And Footprint
Calculation Breakdown
📊Displacement Profile Grid
🗂Footprint Comparison
| Footprint mode | Area formula | Volume per 1 in | Use case |
|---|---|---|---|
| Rectangle | length × width | area / 231 gal | Most standard tanks and sumps |
| Cube | side × side | side area / 231 gal | Nano cubes and reef cubes |
| Cylinder | π × radius² | round area / 231 gal | Column or circular aquariums |
| Bowfront | rectangle + length × bow × 0.67 | curved footprint / 231 gal | Curved front display tanks |
| Custom area | entered footprint area | entered area / 231 gal | Sumps, odd shapes, divided tanks |
📐Common Tank Fill Reference
| Common tank | Inside footprint estimate | Water per 1 in | Typical safe freeboard |
|---|---|---|---|
| 10 gallon | 19.7 x 9.7 in / 50 x 25 cm | 0.83 gal / 3.1 L | 0.75-1.25 in / 2-3 cm |
| 20 long | 29.6 x 11.6 in / 75 x 29 cm | 1.49 gal / 5.6 L | 0.75-1.5 in / 2-4 cm |
| 29 gallon | 29.5 x 11.5 in / 75 x 29 cm | 1.47 gal / 5.6 L | 1-1.5 in / 3-4 cm |
| 40 breeder | 35.4 x 17.4 in / 90 x 44 cm | 2.67 gal / 10.1 L | 1-2 in / 3-5 cm |
| 55 gallon | 47.4 x 12.4 in / 120 x 31 cm | 2.54 gal / 9.6 L | 1.25-2 in / 3-5 cm |
| 75 gallon | 47.3 x 17.3 in / 120 x 44 cm | 3.54 gal / 13.4 L | 1.25-2 in / 3-5 cm |
🌊Substrate And Rock Water Loss
| Aquascape profile | Substrate solid fraction | Rock allowance | Height effect |
|---|---|---|---|
| Bare bottom or quarantine | 0% | 0% | Target volume nearly equals gross fill |
| Thin sand bed | 45% | 2% | Shallow substrate raises waterline slightly |
| Planted substrate | 55% | 4% | Soil, cap, roots, and wood reduce net water |
| Deep sand bed | 62% | 4% | Deep bed can consume several gallons |
| Iwagumi stone layout | 50% | 8% | Stone volume is often the dominant loss |
| Reef rock and sand | 48% | 12% | Porous rock still displaces measurable water |
| Rocky cichlid hardscape | 42% | 16% | Large piles push the fill mark upward |
| Shrimp nano scape | 58% | 5% | Small tanks are sensitive to small changes |
📏Fill Mark Planning Table
| Mark interval | Best unit system | Typical use | Practical note |
|---|---|---|---|
| 0.5 gal / 2 L | Nano tanks | Dosing-sensitive shrimp and fry tanks | Use fine tape or a removable marker |
| 1 gal / 5 L | Small and medium tanks | Water changes and top-off checks | Common balance of accuracy and readability |
| 2 gal / 10 L | Large display tanks | Fast refill stops | Works well on wide footprints |
| 5 gal / 20 L | Large sumps or fish rooms | Bulk water storage and sump operating levels | Use with a separate maximum safe line |
💡Practical Tips
When filling your tank, there is always a moment when you look into it while holding a bucket full of water. You wonder, “Where do I put this?” It can’t be that hard; just pour it all in! Ah, but then there’s that pesky matter of displacement.
What do you measure as “thirty gallons“? That volume gets gobbled up by the hardscape. Now your heater cord hang unsteadily over the edge and water touches top of rim. No worries.
How to Measure Your Tank’s Water Volume
Determining how many gallon your actual tank contains isn’t voodoo; it’s geometry and material science. Define your dimensions or hardscape and let the calculator runs the tough stuff. Avoid the heartache (and wallet ache) of overfilling and stressing your livestock.
The usable water volume is not equal to the labeled capacity. What does that mean? The labeled capacity of a tank refers to the total internal volume of the glass. When you start adding substrate, wood, rock, and equipment, those item displace the water.
How much do they take up? Every time you add another piece of rock or gravel, it pushes the water aside. Keep doing that and eventually, you’ll end up with more than what’s in the tank…which means you’re overfilled.
Enter the tool. Whether you have a heavily landscaped reef tank using porous rock or a bare bottom quarantine set-up, this tool allow you to put in your aquascape profile.
Why does it matter? A thick layer of sand might consume as much as 55% of its volume in water retention! Dense stone displace almost 100% of its volume. Understanding how much your substrate retains keeps you from making blind guesses.
Freeboard is the gap between the top of the tank and the water level. Some freeboard is necessary for overflow boxes, wave action, and splashing (a test kit falls in, a net drops). If there isn’t enough, each cleaning will be a near miss. If too high then you have a shallow pool of water where the fish swim which is aesthetically unappealing, provides lower surface area for gas exchange, and may lead to problems with breeding. I typically leave 1-2 inches as a general guideline based off what you’ll put into it.
If you’re just getting started, don’t have a tape measure, or just want some quick benchmarks, the reference tables will help.
You must be patient to get accurate measurements. Don’t trust what comes from the box; all that glass makes a difference in measurement. For example, footprint on the inside will always be less than stated by the manufacturer. Take a tape measure and find the length and width (depth) of the interior space. If you have a bowfront tank, it’s curved so there’s more volume than you’ll get with just a rectangle calculation. The tool does take into account the shape, and you can enter depth of the bow. It also lets you make an adjustment based on any rocks you’ve displaced manually.
Once you’ve set up your hardscape, you measure what remains unfilled, calculate the amount needed to fill, then quit filling once water reaches where you want it to be.
One common error that many hobbyists commit is they start by filling the tank instead of adding rocks at first. That means you will end up doing the work twice: filling the tank, adding rocks, and seeing the water rise too close to the rim. Then, remove some volume using a siphon. What a mess! And what a waste of time!
Instead, map it out first. Place the rock and soil around, calculate exact amount of water necessary to get to where you want, and fill the tank with that specific amount. It becomes precise instead of chaotic.
The same goes for water changes. Knowing the net volume of water in your tank, i.e. Knowing the net volume of water in your tank, meaning how much water is left after accounting for hardscape, will allow you to accurately replace what was lost. This helps you maintain steady parameters, such as consistent salinity if you have a saltwater system. You’ll feel confident knowing your numbers instead of just guessing.
Being more accurate leads to more management than guesswork. It’s about creating an environment that you don’t have to worry about. When it filters, it doesn’t rattle on the glass; no panicking over did I put in enough water this last time I was doing maintenance? Just measure twice, calculate once. Simple math, priceless peace of mind. You know what goes where and you add water with intention.