Salt to Raise Salinity Calculator
Estimate salt mix needed from current and target salinity, volume, temperature, displacement, reserve, and safe step size.
🎯Quick Presets
⚙Calculator Inputs
📊Salinity Mode Comparison
🧂Salt Mix Strength Reference
| Mix profile | Strength used | Planning character | Calculator note |
|---|---|---|---|
| Standard reef mix | 35g/L @35ppt | Balanced reef baseline | 1 g/L per 1 ppt |
| High alkalinity reef mix | 36 g/L at 35 ppt | Slightly heavier dry dose | Use label if different |
| Natural seawater style | 34.5 g/L at 35 ppt | Lean mix estimate | Good for precise batch mixing |
| Fish-only mix | 35.5 g/L at 35 ppt | General marine blend | Works for FOWLR planning |
| Brackish marine salt | 34 g/L at 35 ppt | Lower target systems | Scale by ppt difference |
| Hypo/QT mix | 35g/L @35ppt | Quarantine adjustments | Stage changes carefully |
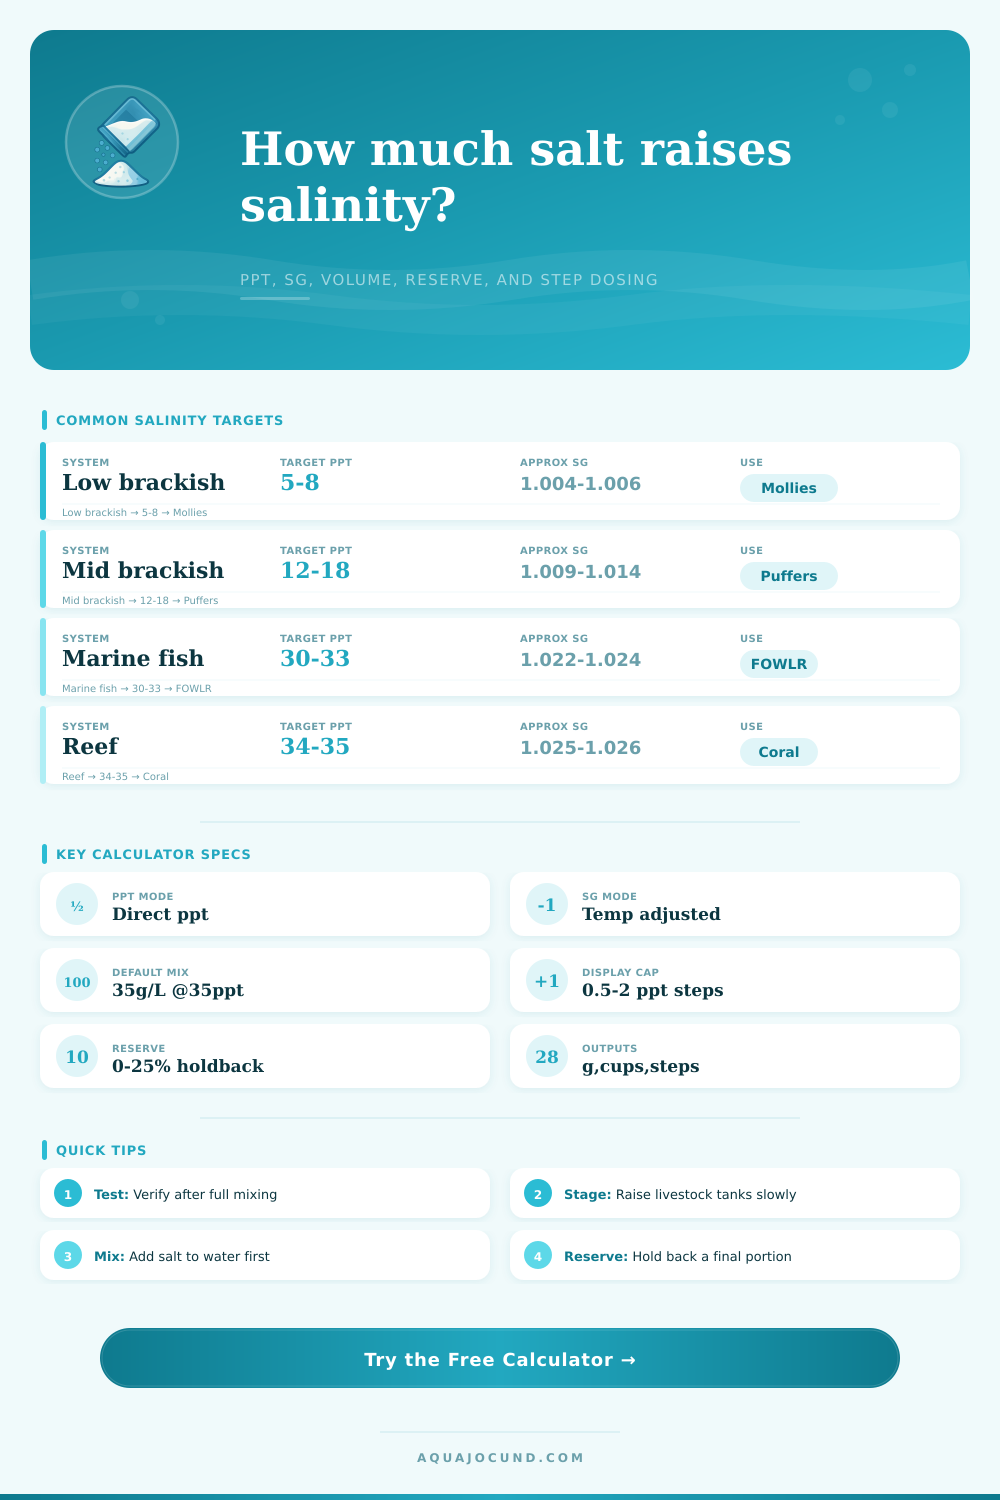
🌊Common Salinity Targets
| System type | Common ppt range | Approx SG at 77°F | Best input mode |
|---|---|---|---|
| Low brackish | 5-8 ppt | 1.004-1.006 | ppt |
| Mid brackish | 12-18 ppt | 1.009-1.014 | ppt |
| Hypo quarantine | 12-16 ppt | 1.009-1.012 | SG with calibrated meter |
| Fish-only | 30-33 ppt | 1.022-1.024 | ppt or SG |
| Reef aquarium | 34-35 ppt | 1.025-1.026 | ppt preferred |
📏Common Tank Size Dose Examples
| Nominal tank | Approx dimensions | Net planning volume | Salt for +1 ppt |
|---|---|---|---|
| 10 gallon nano | 20 × 10 × 12 in / 51 × 25 × 30 cm | 8.8 gal / 33 L | 33 g / 1.2 oz |
| 20 gallon long | 30 × 12 × 12 in / 76 × 30 × 30 cm | 17.6 gal / 67 L | 67 g / 2.4 oz |
| 40 breeder | 36 × 18 × 16 in / 91 × 46 × 41 cm | 35 gal / 132 L | 132 g / 4.7 oz |
| 75 gallon reef | 48 × 18 × 21 in / 122 × 46 × 53 cm | 66 gal / 250 L | 250 g / 8.8 oz |
| 120 gallon reef | 48 × 24 × 24 in / 122 × 61 × 61 cm | 106 gal / 401 L | 401 g / 14.1 oz |
⏱Staging Guide
| Situation | Suggested max rise | Retest timing | Calculator setting |
|---|---|---|---|
| Corals or sensitive livestock present | 0.5 ppt per step | 12-24 hours | Display tank correction |
| Stable fish-only display | 1 ppt per step | 6-12 hours | Display tank correction |
| Brackish acclimation plan | 1-2 ppt per planned step | After behavior looks normal | Display tank correction |
| Fresh new saltwater batch | Full target allowed | After fully dissolved and clear | New saltwater batch |
Whether you have a big reef display or a small nano tank, all aquaria systems experiences salinity drift. Every time the water evaporates, it pulls pure water vapor into the air while leaving salts behind in the tank. Because of this, the salt level gradualy increases. Stressing your corals and fish.
To fix this, you want to offset change without creating a chemical imbalance. After plugging in your desired salinity level and tank volume, the calculator does all the work for you. Note that it will ask you how much water is actualy in your tank (i.e., not the nominal tank size). Why? Because water displace other items in a tank such as sand, rocks, and equipment. On average, a heavily rock-filled aquarium lose about 10-15% of its volume to displacement. Failure to account for displacement causes you to overdose on salt, thereby increasing your salinity beyond safe limits and stressing the very creatures you’re aiming to protect.
How to Use the Salinity Calculator Safely
Another factor influencing your readings are temperature. Warm water expands which makes it less dense, but amount of dissolved salt stays the same. For this reason, parts per thousand values read on a calibrated refractometer is typically more accurate for dosing purposes then specific gravity read by a swing arm hydrometer. If you need to rely off density readings, the tool will adjust for temperature, but it is better to enter salinity directly for greater accuracy.
From the starting point you are in, it calculate how much salt mix must be added to get to your desired level. Instead of showing you one number, it shows you dosage in easy-to-manage portions. Dumping all the salt will cause an osmotic shock which stuns, if not outright kills, any livestock. Small increases (half a part per thousand every hour) allows for the aquarium to stabilize over time and for tank occupants to acclimate to new conditions.
A good safety practice is the reserve feature. This sets aside part of the dose calculation so that when you mix your salt, you can test your water after dosing to see if level went up as planned. The buffer takes into account any measurement inaccuracies and imperfect mixing. You can confirm the water has indeed increased in salinity as desired and then top off with the reserved amount if necessary. It’s a lesson in not making expensive mistake.
The target range will change depending on the tank’s inhabitants. Marine reef tanks needs more salinity than brackish tanks. Brackish tanks should of have less salinity than quarantine tanks, which treat for parasites with low salinity. Depending on your livestock, this chart indicate what is considered a good range of targets. Tighter control at thirty-five parts per thousand work well for a sensitive coral garden while wider swings are fine for fish only set up.
Avoid making one of these common mistakes. Pouring dry salt into the tank, especially into an area with low flow or right onto your live rock. Such actions result in extra salty spots that will kill detritivores and burn through substrate. Always dissolve the salt into fresh water first. Once mixed, clear solution completely before adding it to the tank. Use a powerhead or return pump nearby to mix well so that it distributes evenly across the tank.
Don’t expect perfection, that’s not what it takes to manage your saltiness. You need to monitor it constantly, especially after a water change or when water evaporates. Follow the map provided by the tool, yet look to your livestock for signs of when you are in balance. Respect the osmotic stress boundaries. Stabilize the salinity and let the numbers inform, not dominate, your actions. Consistent effort will ensure animals thrive and the water remains safe.