🧊 Glass Pane Cut List Calculator
Build a practical aquarium glass cut list from finished tank dimensions, glass thickness, seam gap, construction style, bottom inset choice, braces, overflow panes, canopy panes, and waste allowance.
| Pane | Qty | Cut size | Area each | Edge note |
|---|---|---|---|---|
| Choose a preset or calculate to fill the cut list. | ||||
| Tank size | Outside dimensions | Typical glass | Common build style |
|---|---|---|---|
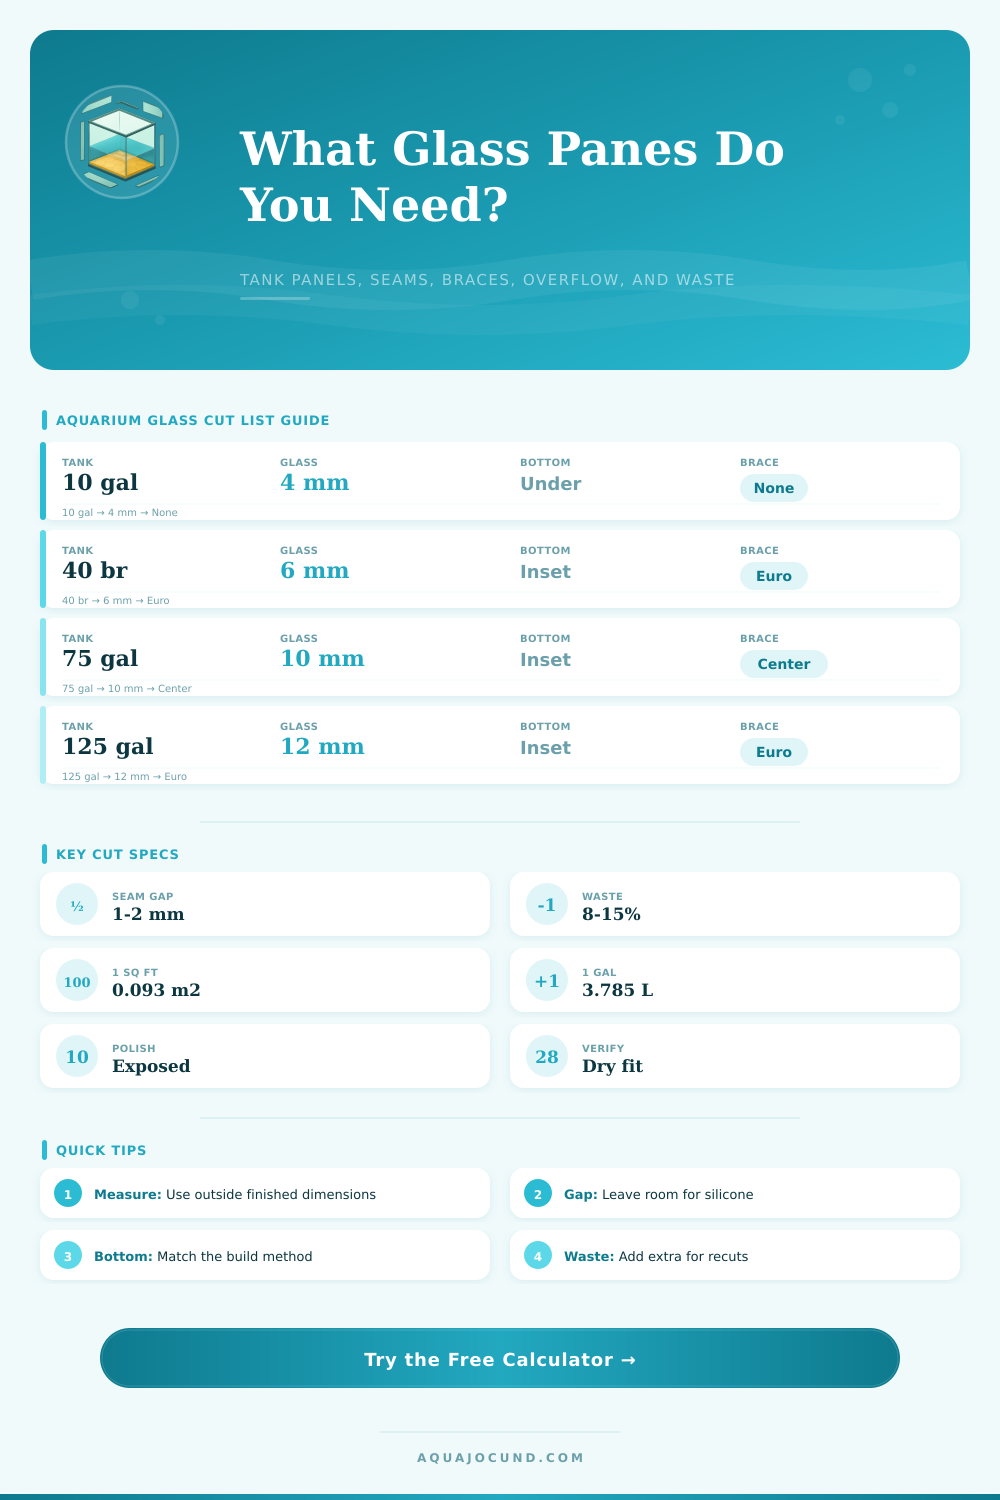
| 10 gallon | 20 x 10 x 12 in / 51 x 25 x 30 cm | 3-4 mm | Bottom under walls, no brace |
| 20 long | 30 x 12 x 12 in / 76 x 30 x 30 cm | 5-6 mm | Front outside, light rim support |
| 40 breeder | 36 x 18 x 16 in / 91 x 46 x 41 cm | 6-8 mm | Inset bottom or euro brace |
| 75 gallon | 48 x 18 x 21 in / 122 x 46 x 53 cm | 10 mm | Inset bottom with center brace |
| 125 gallon | 72 x 18 x 22 in / 183 x 46 x 56 cm | 12 mm | Euro brace plus cross brace |
| Bottom choice | Bottom pane rule | Vertical height rule | Use when |
|---|---|---|---|
| Under vertical walls | Bottom cut near outside footprint | Walls reduced by bottom thickness | Small framed tanks and simple builds |
| Inset inside walls | Bottom fits inside vertical panes | Walls use finished outside height | Clean exterior seams and many custom tanks |
| Flush inset | Inset with extra silicone clearance | Walls use finished outside height | When a larger internal fillet is planned |
| No bottom pane | Wall and accessory panes only | Walls use selected construction style | Replacement sides, braces, covers, or overflow work |
| Style | Front/back pane length | Side pane depth | Practical note |
|---|---|---|---|
| Front and back outside | Full finished length | Depth minus two glass paths and gaps | Most common visual layout for display fronts |
| Sides outside | Length minus two glass paths and gaps | Full finished depth | Useful when end panels wrap the front/back panes |
| Balanced inset | Reduced by one glass path and gap | Reduced by one glass path and gap | Planning shortcut for symmetrical seam layouts |
| Rimless display | Full finished length | Depth between front/back panes | Similar to front outside with stricter edge finish |
| Add-on | Calculator panes | Sizing basis | Edge note |
|---|---|---|---|
| Two long euro strips | 2 strips | Internal length by brace width | Polish inner long edge if visible |
| Full euro brace | 4 strips | Long strips plus side strips | Dry fit corners before silicone |
| Center cross brace | 1 or more strips | Internal front-to-back span | Round exposed corners if requested |
| Corner overflow | Front, side, and base panes | Overflow width, depth, and height | Teeth or weir cuts are not subtracted |
| Cover panes | User count | Entered cover width and depth | Ask for eased edges and handle clearance |
When you are standing in front of your raw float glass, the stakes is high because once it’s cut you can’t uncut it. By now you should of know the size of your tank(s). You should also have some idea how things will goes together, and perhaps even have sketched something out. But how do you translate that to accurate cut lengths? Planning is very important here, ordering glass is a one-way street. Make mistake and you’ll still end up paying full price for faulty goods.
So now we have our first choice: How do the panels cross? Do they both run down the entire length of the tank with the sides fits into place between them, or do the sides sits on the outside? Once you make this choice (which depends on your construction method), the calculator figure it out for you automaticly. This means you won’t have to subtract the thickness of each piece of glass or account for all the silicone spaces between pieces over and over again.
How to Plan Your Glass Tank Build
Why does this matter? If you get it wrong, you’ll end up with a tank that is either too narrow for your stand or more wide than your room. Side-outside builds is fairly popular in simpler framed tanks. Front-outside builds are most popular with display tanks to maximize your viewing window.
Second, what will be your bottom pane setup? Will it be an under-bottom (with the floor panel below the vertical walls) or inset bottom (inside the walls)? The former is easier to seal but adds a bit of extra height outside the tank. The latter keeps the exterior size compact and tidy but require careful corner joint.
Generally speaking, certain types of tanks are better suited for specific builds than others. Table of references shows some common combinations of tank size and method of construction. For example, a ten gallon cube probably won’t require elaborate support, while a seventy five gallon show tank very likely will. Knowing these guidelines helps you avoid using a small-tank setup on a large tank which could collapse and leak under the weight of water.
The weight of water is not small, so glass thickness is something that must be taken seriously. A three foot tall wall made with quarter inch glass isn’t going to stay up. Thicker glass are needed to stop bending as panel height increases. Enter the dimensions (finished height/width/thickness) into the calculator and it will tell you whether what you’re planning is even physically possible before you waste your money.
If your plans involve a big tank, you’ll need to include some sort of internal support in the form of center cross braces or euro brace strips to ensure it stay strong. Cross braces takes the stress off the glass and prevent it from deflecting outwards over time.
Plan for some waste because even a pro sometimes breaks a pane by slipping or finding a hidden flaw. Eight to 15 percent extra is good (so you don’t have to panic order late at night) of total area you’ll cut. It also covers edge chips that must be smoothed or polished. This is part of the cost/safety decision about which seam(sides) to polish.
Look pro, no cuts: Viewing edges exposed, yes. Seams against silicone, no. Make sure to check your own numbers for volume before ordering. You define the gap size between seams and the thickness of the glass. Those are used in the calculator to estimate the actual usable water volume. That way you know if it’s going to be too much for your equipment and sump.
Also make sure that your stand will hold the weight of your tank when it is full of everything inside, such as sand, substrate, or decorations. A full 125 gallon tank will weigh well over a thousand pounds when fully assembled. So you must plan structurally based off as well as for the glass.
Lastly, do a mental dry fit. Make sure everything line up and visualize what final assembled tank will look like. If you’re installing an overflow box, verify the braces line up to it. Confirm all canopy panes overlap to keep out rain/water.
In other words, go into the glass shop with a list so that nothing can be misinterpreted. Clear instructions on the cut list mean clear cuts which means the tank holds water as advertised. A good cut list makes the build process easy instead of chaotic.