🔬 Infusoria Culture Calculator
Size a fry-food culture by jar volume, starter, food source, temperature, harvest plan, and crash risk.
Culture Estimate
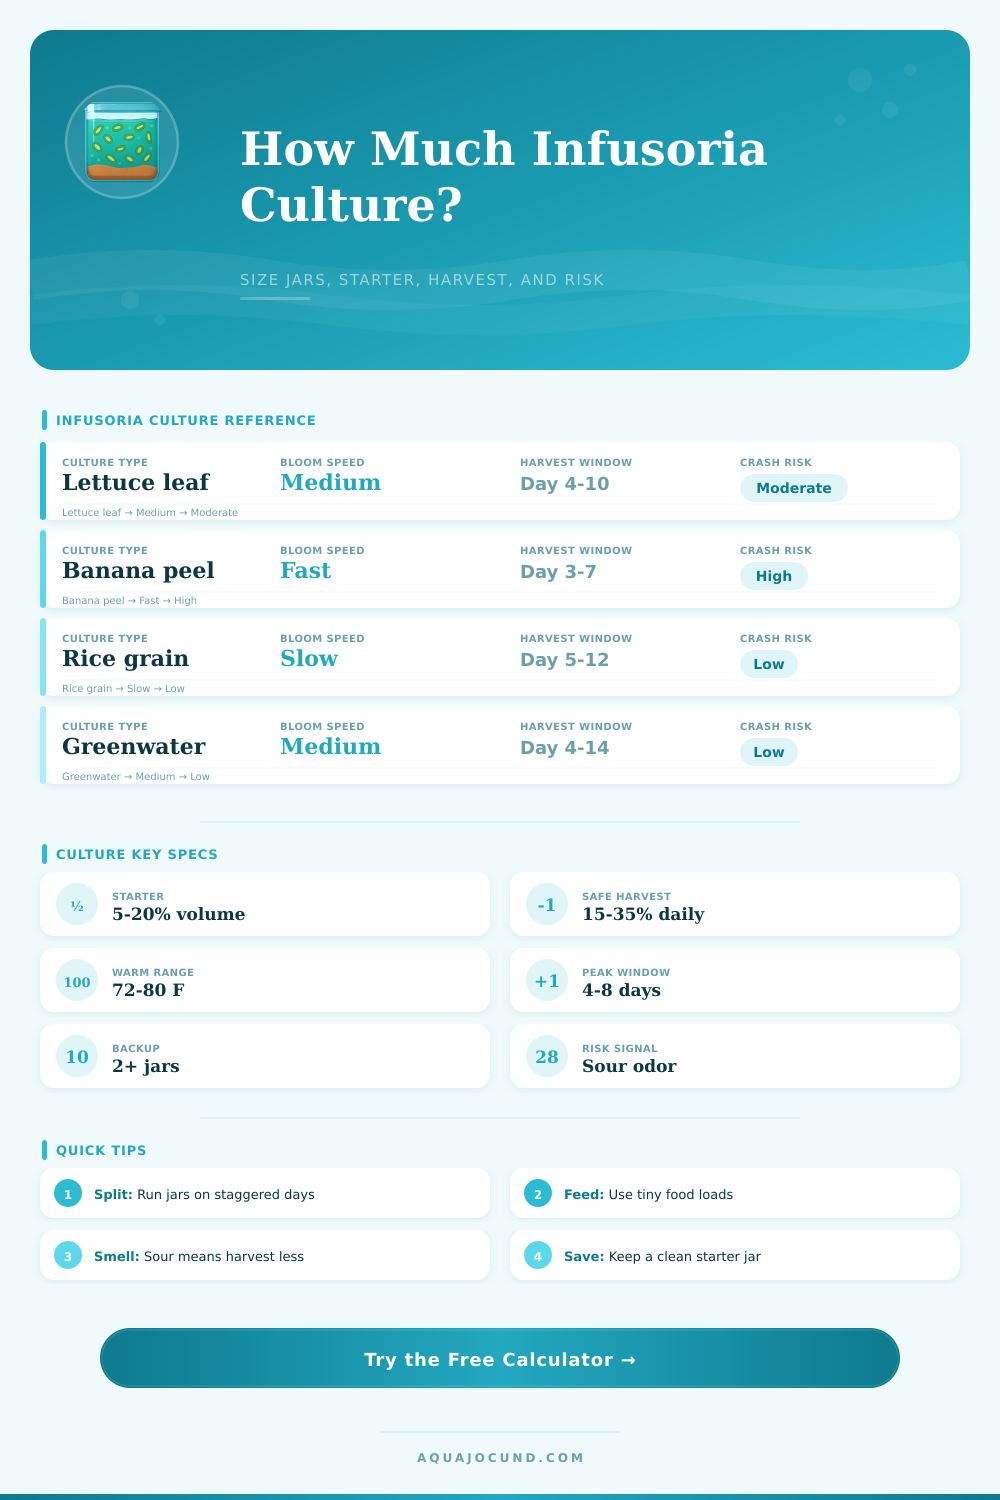
| Food source | Relative bloom | Peak window | Base yield | Crash note |
|---|---|---|---|---|
| Blanched lettuce leaf | Medium | Day 4-10 | Balanced | Remove decaying pieces if odor sharpens |
| Tiny banana peel piece | Fast | Day 3-7 | High early | Small pieces only; excess ferments quickly |
| Cooked rice grain | Slow | Day 5-12 | Moderate | Stable when only one grain is used |
| Dilute yeast drop | Very fast | Day 2-5 | High spike | Easy to overdose and cloud sour |
| Spirulina dust | Medium fast | Day 3-8 | Good | Dust lightly to avoid bottom sludge |
| Greenwater boost | Medium | Day 4-14 | Steady | Best with light and gentle harvests |
| Aged leaf or hay tea | Slow medium | Day 5-14 | Steady | Use clean, pesticide-free material |
| Commercial microfood dust | Fast | Day 3-7 | Good | Overfeeding creates fine residue |
| Temperature | Bloom speed | Useful age | Stability | Calculator effect |
|---|---|---|---|---|
| 64-68°F / 18-20°C | Slow | Day 6-14 | Stable | Lower daily harvest, lower crash pressure |
| 70-72°F / 21-22°C | Moderate | Day 5-12 | Good | Reliable for backup jars |
| 74-78°F / 23-26°C | Fast | Day 3-9 | Good if lightly fed | Highest balanced yield range |
| 80-84°F / 27-29°C | Very fast | Day 2-6 | Shorter window | More yield but higher crash risk |
| 86°F+ / 30°C+ | Rapid spike | Day 2-4 | Fragile | Crash risk rises sharply |
| Vessel plan | Total volume | Starter at 10% | Typical safe harvest | Best use |
|---|---|---|---|---|
| Single pint jar | 0.47 L / 16 fl oz | 47 ml / 1.6 fl oz | 70-140 ml/day | Small killifish or backup starter |
| Single quart jar | 0.95 L / 32 fl oz | 95 ml / 3.2 fl oz | 140-280 ml/day | Small egg-layer spawn |
| Two quart jars | 1.9 L / 64 fl oz | 190 ml / 6.4 fl oz | 280-560 ml/day | Betta or gourami first week |
| Half gallon culture | 1.9 L / 64 fl oz | 190 ml / 6.4 fl oz | 280-560 ml/day | Continuous harvest with care |
| One gallon culture | 3.8 L / 128 fl oz | 379 ml / 12.8 fl oz | 570-1130 ml/day | Large batch or multiple tanks |
| Fry profile | Daily culture guide | Feeding pattern | Transition cue | Planning note |
|---|---|---|---|---|
| Tiny egg-layer fry | 1.5-3 ml per fry | 3-5 feeds | Bellies visible after meals | Needs dense micro-life more than volume |
| Betta / gourami fry | 2-4 ml per fry | 4-6 feeds | Can chase larger live foods | Use multiple jars to avoid gaps |
| Characin / tetra fry | 2-3.5 ml per fry | 3-5 feeds | Steady horizontal swimming | Prefer clean, lightly cloudy culture |
| Small killifish fry | 1-2.5 ml per fry | 2-4 feeds | Taking vinegar eel or BBS | Small batches usually work well |
| Small livebearer fry | 0.5-1.5 ml per fry | 2-3 feeds | Taking powder immediately | Often needs less infusoria support |
| Shrimp or micro grazers | 0.2-0.8 ml each | 1-2 feeds | Grazing biofilm steadily | Very small additions protect water |
When your gourami or betta has spawned, where will it get its feed? The eggs are tiny (clear) strands with actualy no reserve stores. Before its eyes even open, fry starve if they dont recieve nourishment right away. For those little mouths, tiny organisms, a cloud of microscopic rotifers, algae, and ciliates, provide a hazy suspension.
It’s possible to attempt growing it yourself, starting from scratch using banana peels or blanched lettuce, though the margin for error here are slim. That’s what the calculator above will do for you. It won’t take the guesswork out of infusoria making, but it will make sure your calculations comes out right.
How to Make Food for Baby Fish
One thing that sets many newbies back is that they think more food source = more food for bugs. That isn’t necessarily true. Lettuce takes longer, but more consistantly. Rice grains is a good baseline (slow to develop), but they just take an extra day to peak. Banana peels are quick (too quick!) and quickly release sugars which tend to produce an aggressive bloom. This can produce an aggressive bloom that crashes the pH and kills the very organisms you are trying to harvest.
Use this tool to plug all those variables into one equation. You can see how much food to use based off your temperature and jar size so you don’t get a sludgy, stinky mess. There’s the great equalizer: temperature. Speed up the water with heat, and all that happens faster. But going faster usually means a spike on day two and a collapse on day four. Slow down the water, and it widens your harvest window, giving you more time before you see any pressure. Tweak the water temperature input, and the system re-calibrates to predict how fast the bloom will occur and how long it’ll hold steady.
It isn’t just a matter of how rapidly the bugs will reproduce. It’s also a matter of how long they can stay happy in the environment. Maybe a frantic 85-degree culture won’t beat a stable, slower-growing seventy-six-degree culture…because it doesn’t last as long then. And that’s where thinking about volume as related to safety margin comes in. Taking out too much from a small container will reduce the population below what it needs to survive overnight. In the chart above you can see safe daily draw percentage based on vessel size. If you’re taking lots of heavy draw then a single pint jar just isn’t enough to maintain a single batch of life. Two quarts will allow for staggered batches, where one peaks out as another builds up. More importantly, this extra amount provides insurance against an inevitable bad day. It is the difference between a successful hatch and tank full of ghost fish.
The culture strength refers to how strong your starter is. It is far more than many realize. Putting some clear, weak water out of the existing tank doesn’t do much to get things going. It is not strong in active microbe that will eat the food source. You want dense, cloudy starter that’s already hard at work. That’s accounted for by the calculator when calculating how much inoculant is necessary. Starting with a good culture allows you to use less but still have a robust bloom. It also leaves you more room in your jar for the stuff you’re trying to grow, whatever that may be. These include spirulina dust, hay tea, commercial microfood, and more.
But that’s the rub. What about those other signs? What does cloudy, clear, gray sludge on the bottom tell you? How about that smell? When should you start harvesting and how much less do you go? The clear stuff could be a sign of either balance in the culture… or its death. It could also be a sign that the culture has fermented past any microbial growth, meaning you’ll want to harvest less (or nothing) next time. The smell can tell you that too. Sour smells is a sign of out-of-control fermentation. Gray sludge on the bottom tells you something else: Anaerobic decay. Toxic to fry.
What’s that? Your culture turned all sorts of colors? Don’t freak! Those colors are part of the process. Keep the jars warmish, feed conservatively and use your sense to check what’s happening. What you’re seeing is food. It’s not dirt. Let it bloom. Take what you need. And leave the rest to work. You should of seen it coming.